To enable 3D interaction or to be able to make adjustments to cameras, lighting and some more, individual setting options are to be made via the JSON text field in the Stage in the admin menu of klar.land. We explain how this works in detail here.

A minimal JSON code can be generated after uploading a glb file by clicking the “Generate defaultjson” button (the glb file must contain at least one camera named “Defaultcam”).
Minimal JSON code looks like this (with this one stage already works). This code can be extended as desired using the following documentation.
{
 "Stage3dData" :[
{
 "threedfile" : "Dateiname.glb",
 "outlinelevel" : 0,
 "lightsetup": 0,
 "spritescale": 1,
 "defaultqualitylevel": 0,
 "scenetype": "_3d"
}
]
}
(!) important note: in the following JSON code snippets, parentheses may be missing in some cases or parameters are given only in general form like [number]. Therefore it is recommended to copy or adapt code only from working JSONs of stages.
Data requirement
Stage3dData must be specified:
Structure:
"Stage3dData" :[
    {
   "threedfile" : "szenenname.glb",
    "outlinelevel" : [number],
  "perspectives":[
          {
              "name":"Standard Kamera",
              "camera":"Defaultcam"
          }
],
    "lightsetup": [number],
    "spritescale": [number],
    "defaultqualitylevel": [number],
    "scenetype": [string]
    },
 ],
"AOMaps" : [
    {
    "mesh":"Meshname",
    "aomap":"Texturname.jpg"
    }
],
Explanation:
“threedfile” : “scenename.glb” filename of the scene (currently only glbs supported)
“outlinelevel” : 0 if objects should already get their outline (blue frame to highlight clickable objects) when loading the scene, 1 if objects should get their outline only after clicking the button.
“perspectives” : optional, listing of cameras to appear in the menu
“lightsetup” : 0 uses HDR only, 1 uses HDR + Point + Arealight (currently not implemented).
“spritescale” : 1 the scaling of the button textures,
“defaultqualitylevel” : 0 = renderpass + outlinepass + fxaapass (compromise of performance + appearance), 1 = ssaapass + outlinepass (better anti-aliasing, worse performance)
“scenetype: 3d or 360
"useCases" :[

            {
        "name":"Usecasename",
        "group":"Usecasegroup",
        "animationlayer": [number],
        "state":[number],
            "trigger_objects":["triggerobject"],
            "cam":
            {
                "name": "camname",
                "position": [0, 0, 0],
                "rotation":[0, 0, 0],
                "lookatTarget": "lookatobject"
            },
            "animations":
            [
                {
                    "name":"Objektname Anim01",
                    "tc":0,
                    "loop":"true"
                },
                {
                    "name":"Objektname Anim02",
                    "tc":0
                }
            ]
    },
“camname” must end with cam
“lookatTarget” : “lookatobject” (if not specified the clicked object is used as lookattarget)
“name” : “[Objektname Anim01]” (must start with the animation object in glb as well as in JSON, followed by a space and then the unique animation name) // e.g. ‘flap_up_armature open’, if a space in the animation name is not possible due to software (e.g. with 3dsMax), then a % character can also be used
“tc” :[number] (timecode in seconds, animation will be played after the specified time, i.e. it is only a delay of the start – the animation will be played completely).
“loop” : true (if specified and true the animation is played as a loop, so it repeats)
“autoplay” : true – if an animation should be played automatically from the start
Explanation of animation layers/states
Animation layers are primarily used for highlighting objects and assigning which objects are higlited and selectable when clicked.
State is used for when an object has multiple states and should play a different animation depending on the state.
z. B.:
Animationlayer 0: Gets no highlighting and is used for the buttons, so when the camera jumps to a place without interaction.
Animationlayer 1: Highlighted when the animationlayer 0 object (the button) of the group is clicked.
Animationlayer 2: Will be gehighlited as soon as the object of animationlayer 0 of the group is clicked.
Example:
Animation layer 0: jump to drawer 3
Animation layer 1: open drawer 3
Animation layer 2: Play animation of clicked knife, what is in the drawer.
State 0/1 are used for animation toggling currently:
So:
Object by default in state 0, if it is clicked it will be checked if it has an animation with state 1. If this is the case, the animation is played and the object is in state 1.
If it is clicked again, the state 1 animation is played and the object is set to state 0 again.
Example:
State 0: Cereal cabinet door opens
State 1: Cereal cabinet door closes (edited)
More states than 0 and 1 and the query of these are currently planned/underway.
Other details:
Animations array can be inserted as animation into an animations array. This animation sequence can then be looped.
Background Color
Setting the background color:
{
  "Stage3dData": [
    {
	"backgroundColor": "rgb(81, 87, 99)",
	.....
In addition to rgb, the background color can be specified as follows:
“rgb(255, 0, 0)”
“rgb(100%, 0%, 0%)”
X11 color name – all 140 color names are supported.
‘skyblue’
//HSL string
“hsl(0, 100%, 50%)”
Hdr ambient light
Optional.
If not specified, the default studio hdr is used: /files/stages/hdr/studio_01.hdr.
Under “hdr” –“name” you have the option to specify the file name of the Hdr file for this stage. This must be located on the server under “/files/stages/hdr”. Send the file to your klar.land account manager, who will make it available for you there.
We currently offer the following standard HDRI:
- adams_place_brigde_1k.hdr
- autoshop_01_1k.hdr
- comfy_cafe_1k.hdr
- gradient_01.hdr
- hotel_room_1k.hdr
- shanghai_bund_1k.hdr
- skylit_garage_1k.hdr
- studio_01.hdr
- studio_01_heller.hdr
- studio_small_06_1k.hdr
- studio_small_08_1k.hdr
- venice_sunset_1k.hdr
- white.hdr
“intensity” : intensity of the light – may have to be tested several times.
Example – JSON:
"Stage3dData" :[
    {
      "threedfile" : "muellmaschiene.glb",
      "outlinelevel" : 0,
      "lightsetup": 0,
       "hdr":{
          "name":"venice_sunset_1k.hdr",
         		 "intensity": 3
      },
      "spritescale": 1,
      "defaultqualitylevel": 0,
      "scenetype": "3d",
Call HTML documents via object click
This can be created in the documents area within a use case:
Example – JSON:
 {
      "cam": {
        "name": "rauchmelder01cam",
        "position": [
          0,
          0,
          0
        ],
        "rotation": [
          0,
          0,
          0
        ],
        "lookattarget": "rauchmelder01"
      },
      "name": "rm",
      "group": "rm",
      "state": 0,
      "documents": [
        {
          "name": "rauchmelder.html",
          "type": "html",
          "uuid": "d90701d8-0769-4ba6-b23e-327ca0637df1",
          "playonclick": true
        }
      ],
      "animationlayer": 0,
      "trigger_objects": [
        "rauchmeldergruppe01"
      ]
    },
Call hyperlink by object click
For this purpose, in a use case
“gotourl” : “URL” must be entered
(currently opens in new tab)
Example – Usecase:
  {
	"name":"zb out",
        "group":"zb",
        "animationlayer": 0,
        "state":0,
        "gotourl":"https://www.klar.land",
	"trigger_objects":["zbgroup"],
	"cam":
	{
        "name": "zbcam",
	"position": [0, 0, 0],
	"rotation":[0, 0, 0]
	},
        "animations":
            [
	        {
                    "name":"zbgroup%out",
                    "tc":0
		}
	]
    }
Material – Animations
Basically, you can create a materialAnimations array object in any useCase:
“materialAnimations“: [{}] The following parameters can be entered in this:
name: nothing has to be considered here except that the name is unique and does not appear a second time in the json.
action: here you have to specify what kind of material animation should be executed.
Possible values are:
changeMaterialValue
addMaterialValueTween
changeTexturePositionValue
addTexturePositionValue
changeTextureRotationDegreeValue
addTextureRotationDegreeValue
stopMaterialAnimation
To explain:
The difference between add and change is that with add the desired values are added to the old material values, with change the current ones are changed to the specified values.
This is especially relevant for loops.
For example, if you want a texture to move to the right on the x-axis, you could use changeTexturePositionValue, e.g. from 0 to 2. If you then specified that this should be done as a loop, the texture would move from position x=0 to x=2. However, when the loop is executed the second time, the texture would no longer move because it is moved to x=2 but is already at that position.
If you want to increase the value by 1 per loop run, you should use the appropriate “add” action. This makes it possible to adjust material values as well as rotate or move textures. With stopMaterialAnimation running MaterialAnimations can be stopped. This is relevant e.g. for animations that are in an infinite loop and should be stopped.
Loop:
This is an optional parameter.
If it is not set, the materialAnimation is executed once.
If this parameter is set and has the value 0 or true, it is looped infinitely.
If a numerical value is specified here, the animation is looped as often as specified in the value.
loop = 12 causes the material animation to be repeated exactly 12 times.
start_tc:
end_tc:
Here the start and end time of the animation is defined in seconds (decimal places are possible).
start_tc specifies when the material animation should start after the UseCase is executed.
start_tc = 2 the animation starts 2 seconds delayed, at start_tc = 0 the animation starts immediately.
end_tc specifies when the animation should stop.
The combination of both values determines how fast the animation should be executed. The closer start_tc and end_tc are to each other, the faster the animation will play.
materialName:Here you must specify the name of the material to be animated.
materialproperty:determines which material property/texture should be affected.
possible materialProperties:
opacity
emissiveIntensity
emissive
aoMapIntensity
bumpScale
color
displacementScale
envMapIntensity
lightMapIntensity
metalness
roughness
possible textures:
map
alphaMap
emissiveMap
aoMap
bumpMap
envMap
displacementMap
lightMap
metalnessMap
normalMap
affectedvalue:
This is an optional parameter that only needs to be specified if the addTexturePositionValue or changeTexturePositionValue actions are specified.
Currently x or y can be specified here.
So if a texture is supposed to move horizontally, you would enter x, if it is supposed to move vertically, you would enter y here.
For example: “affectedvalue”: “x”,
tweenValue
The numerical value to which the selected property should be set.
If a texture rotation action is selected, the desired rotation should be specified in degrees.
e.g. rotate texture once by 180 degrees:
“tweenValue”: 180,
json example:
{
  "useCases": [
    {
      "name": "Start Opacity Animation",
      "group": "Material",
      "state": 0,
      "animationlayer": 0,
      "trigger_objects": [
        "Cube0"
      ],
      "materialAnimations": [
        {
          "loop": true,
          "name": "changeOpacity",
          "action": "changeMaterialValue",
          "end_tc": 10,
          "start_tc": 0,
          "tweenValue": 0,
          "materialName": "Material0",
          "materialproperty": "opacity"
        }
      ]
    },
    {
      "name": "Start Diffuse Map Animation",
      "group": "Material",
      "state": 0,
      "animationlayer": 0,
      "trigger_objects": [
        "Cube1"
      ],
      "materialAnimations": [
        {
          "loop": 0,
          "name": "add diffuse pos",
          "action": "addTexturePositionValue",
          "end_tc": 2,
          "start_tc": 0,
          "tweenValue": 2,
          "materialName": "Material1",
          "affectedvalue": "x",
          "materialproperty": "map"
        }
      ]
    },
    {
      "name": "Start AlphaMap Animation",
      "group": "Material",
      "state": 0,
      "animationlayer": 0,
      "trigger_objects": [
        "Cube5"
      ],
      "materialAnimations": [
        {
          "name": "add diffuse pos",
          "action": "addTexturePositionValue",
          "end_tc": 8,
          "start_tc": 0,
          "tweenValue": 2,
          "materialName": "Material5",
          "affectedvalue": "x",
          "materialproperty": "map"
        }
      ]
    },
    {
      "name": "Start Diffuse Map Animation",
      "group": "Material",
      "state": 0,
      "animationlayer": 0,
      "trigger_objects": [
        "Cube2"
      ],
      "materialAnimations": [
        {
          "loop": 2,
          "name": "change diffuse pos",
          "action": "changeTexturePositionValue",
          "end_tc": 10,
          "start_tc": 0,
          "tweenValue": 2,
          "materialName": "Material2",
          "affectedvalue": "y",
          "materialproperty": "map"
        }
      ]
    },
    {
      "name": "Start Diffuse Map Rotation Animation",
      "group": "Material",
      "state": 0,
      "animationlayer": 0,
      "trigger_objects": [
        "Cube3"
      ],
      "materialAnimations": [
        {
          "loop": 1,
          "name": "add diffuse rotation",
          "action": "addTextureRotationDegreeValue",
          "end_tc": 10,
          "start_tc": 0,
          "tweenValue": 180,
          "materialName": "Material3",
          "materialproperty": "map"
        }
      ]
    },
    {
      "name": "trigger lod1 anim",
      "group": "Cube6",
      "state": 0,
      "animations": [
        {
          "tc": 0,
          "name": "Cube6_lod1 Action"
        }
      ],
      "animationlayer": 0,
      "trigger_objects": [
        "Cube6_lod1"
      ]
    },
    {
      "name": "Stop Opacity Animation",
      "group": "Material",
      "state": 0,
      "animationlayer": 0,
      "trigger_objects": [
        "Cube4"
      ],
      "materialAnimations": [
        {
          "name": "changeOpacity",
          "action": "stopMaterialAnimation",
          "start_tc": 0
        }
      ]
    }
  ],
  "Stage3dData": [
    {
      "controls": {
        "maxZoom": 100000,
        "minZoom": 1,
        "zoomMode": 1,
        "maxDistance": 100000,
        "minDistance": 1
      },
      "scenetype": "_3d",
      "lightsetup": 0,
      "threedfile": "cube6.glb",
      "loddistance": 5,
      "spritescale": 1,
      "outlinelevel": 0,
      "defaultqualitylevel": 0
    }
  ]
}
Call media (pdfs/videos/…)

There is a possibility to retrieve one or more documents (video/mp4, pdf, jpg, png) when clicking an object or button, which will then appear in the “Media” tab for retrieval.
The media must be uploaded to the server in the docs folder of the respective stage: /files/stages/[uuid]/docs. (You submit the data to your account manager at klar.land, who stores the data there for you).
“trigger_objects” triggering object or button
“cam” – here, among other things, the name of the associated camera and camera target is specified.
“documents” – one or more documents to retrieve
“type” – video | image | pdf
“uuid” – generate online at https://www.uuidgenerator.net/ and copy + paste
“playonclick” : true | false – if a document should appear directly
Example – JSON:
"useCases" : [
{
"name":"klick_dl_pdf",
"group":"01",
"animationlayer": 0,
"poi_uuid": "0f7fa12e-dd7c-11eb-ba80-0242ac130004",
"state":0,
"trigger_objects":["button_vorne_rechts"],
"cam":
{
"name": "Pdfcam",
"position": [0, 0, 0],
"rotation":[0, 0, 0],
"lookatTarget":"button_vorne_rechts"
},"documents":
[
{
"name":"01/Freund_Demovideo.mp4",
"type":"video",
"uuid":"ac848c20-e879-11eb-9a03-0242ac130003",
"playonclick":true
},{
"name":"01/Freunde_DemoPDF.pdf",
"type":"pdf",
"uuid":"1bd675a6-dd7c-11eb-ba80-0242ac130004"
},{
"name":"01/klardenker_Unternehmenspräsentation_DE.pdf",
"type":"pdf",
"uuid":"cb5473d6-e879-11eb-9a03-0242ac130003"
},{
"name":"01/netzwerken-web.jpg",
"type":"image",
"uuid":"fe743ad0-e879-11eb-9a03-0242ac130003"
},{
"name":"01/Showroom_Demo.mp4",
"type":"video",
"uuid":"139e7574-e87a-11eb-9a03-0242ac130003"
},{
"name":"01/Vorwort_DemoPDF.pdf",
"type":"pdf",
"uuid":"2ef28950-e87a-11eb-9a03-0242ac130003"
}
]
Calling up media from the “Documents” – important for multilingualism
First create the documents in the desired Space. You do this as follows:
Navigate to the desired Space.
Select there under My Computer -> Docs.
Then, for example, create your own folder “stages”, here you can of course freely choose the name according to your preference.
Click / open folder.
Then use the “+” to create a document.
Find a newly created field for a document and search there via “Browser” for the desired file on your computer and upload it. Then click on “Save”.
If you want to offer the file in other languages, then select the desired other language and then again via the “File browser” the desired file in the appropriate language. Click “Save” again, this will make the document available in the newly added language.
Then you copy out the UUID of the document. You need this to insert it in the json in the stage, it is done there as in the other cases listed above.
The script works in such a way that if a UUID exists, it checks if a matching database entry exists. If so, the document will be loaded and displayed. If it is not, the name/path is taken and the corresponding file is loaded. This way existing stages will not be shot.
For new stages it is sufficient to specify the UUID and the type.
An example of a json entry with file linking via the doc UUID:
"useCases" : [
"name": "klick_dl_pdf_03",
"group": "03",
"state": 0,
"poi_uuid": "5cdbbbbc-e883-11eb-9a03-0242ac130003",
"documents": [
{
"name": "03/klardenker_Unternehmenspräsentation_DE.pdf",
"type": "pdf",
"uuid": "8107123e-e883-11eb-9a03-0242ac130003"
},
{
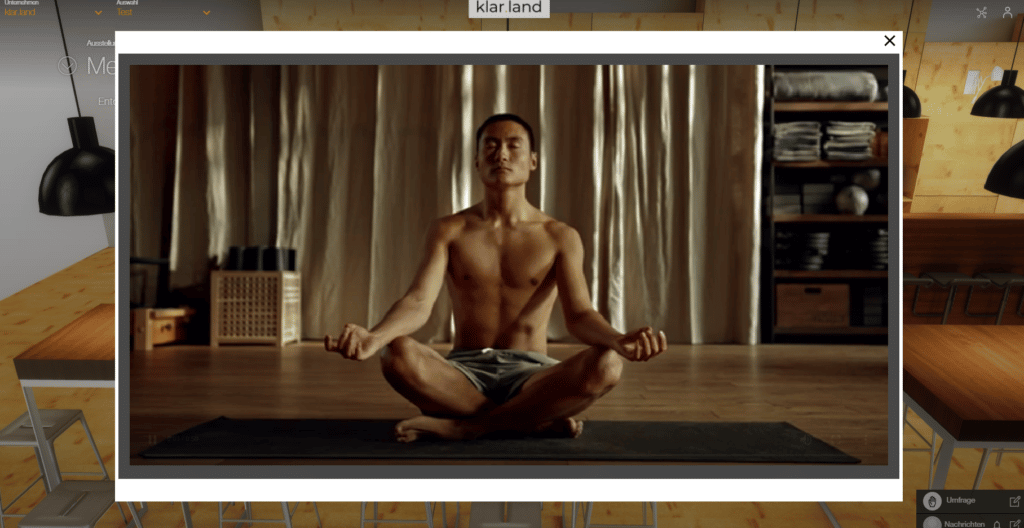
"name": "03/Meditation_DemoVideo.mp4",
"type": "video",
"uuid": "3e7da4a1-6122-483b-9749-2c11caa87fd4",
"playonclick": true
},
{
"name": "03/Sein1_DemoPDF.pdf",
"type": "pdf",
"uuid": "a4ad3ec0-e883-11eb-9a03-0242ac130003"
},
{
"name": "03/Sein2_DemoPDF.pdf",
"type": "pdf",
"uuid": "b2d9a1c8-e883-11eb-9a03-0242ac130003"
},
{
"name": "03/Seminar-web.jpg",
"type": "image",
"uuid": "c1f88a5c-e883-11eb-9a03-0242ac130003"
}
],
"animationlayer": 0,
"trigger_objects": [
"button_03"
]
},
]
Spritesheets (quasi apngs) (for buttons)

Spritesheets, like apngs used, are defined in the “buttons” group.
The png files containing the spritesheets are stored on the server in the directory “/files/stages/sprites”. (If you want to use individual spritesheets, please provide them to your account manager of klar.land and he can make them available on the server).
“buttonObjectName” is the name of the 3D object in the scene. The string “button” should be included in the name. This makes the object behave like a button. I.e. it will always face the camera and when clicked the button will disappear.
“spritename” is the name of the png file located in “/files/stages/sprites”.
“tilesHoriz” : number of horizontal tiles
“tilesVert” : number of vertical tiles
“numTiles” : normally this is the product of the previous two values. However, this can be a different value in exceptional cases (for example, if there are some empty tiles at the end).
“tileDispDuration” : number of milliseconds for which a tile should be displayed.
“invisibleOnClick” : true or false, optional. Indicates whether a button becomes invisible after click or not (=false). Default is true.
Example – JSON:
"Stage3dData" :[
{
"threedfile" : "01.glb",
"outlinelevel" : 0,
"lightsetup": 0,
"spritescale": 1,
"defaultqualitylevel": 0,
"scenetype": "3d",
"buttons":[
{
"buttonObjectName":"button_vorne_rechts",
"spritename":"floorbutton_spritesheet.png",
"tilesHoriz":25,
"tilesVert":1,
"numTiles":25,
"tileDispDuration":55,
"invisibleOnClick":"false"
}
],
Tonemapping
You can choose from 5 modes to customize the look of the stage by tone mapping (post-render effect).
This may need several tests in combination with the Hdr and light intensities to achieve the optimal look for the particular stage.
If nothing is specified, THREE.ACESFilmicToneMapping is used by default.
Example – JSON:
{
"Stage3dData": [
{
"tonemapping": 2,
....
tonemapping can take the values 0, 1, 2, 3, 4, or 5 – where
0 = THREE.NoToneMapping
1 = THREE.LinearToneMapping
2 = THREE.ReinhardToneMapping
3 = THREE.CineonToneMapping
4 = THREE.ACESFilmicToneMapping
5 = THREE.CustomToneMapping


Video textures

For video textures, the respective names of the 3D objects (“videoObject“) on which the video textures are to appear are specified, as well as the relative path to the video file (“videoFile“) on the server.
The videos must be uploaded to the server in the docs folder of the respective stage: /files/stages/[uuid]/docs
(Coordinate data storage with your klar.land account manager).
Example – JSON:
"Stage3dData" :[
{
"threedfile" : "01.glb",
"outlinelevel" : 0,
"lightsetup": 100,
"spritescale": 1,
"defaultqualitylevel": 0,
"scenetype": "3d",
"videotextures":[
{
"videoObject":"_videoplane",
"videoFile":"01/Freund_Demovideo.mp4"
}
]
}
]
“controls” options
Various parameters to set zoom and distance of the cameras as well as mouse button assignment of a stage.
Example – JSON:
{
"Stage3dData": [
{
"hdr": {
"name": "autoshop_01_1k.hdr",
"intensity": 2
},
"controls": {
"maxZoom": 5,
"minZoom": 1,
"zoomMode": 2,
"maxDistance": 5,
"minDistance": 1
},
{
"Stage3dData": [
{
"controls": {
"zoomMode": 3,
"leftMouseMode":5,
"middleMouseMode":1,
"rightMouseMode": 1,
},
......
“zoomMode” can take the values 1 / 2 / 3. These mean
1 = Dolly (standard)
2 = ZOOM
3 = NONE
i.e. 3 disables the zoom
“leftMouseMode” / “middleMouseMode” / “rightMouseMode” can take the values 1 / 2 / 3 / 4 / 5 / 6 respectively. These mean
1 = ROTATE
2 = TRUCK
3 = OFFSET
4 = DOLLY
5 = ZOOM
6 = NONE
If nothing is specified in the JSON code, the default values are
zoomMode = Dolly
leftMouseMode = ROTATE
rightMouseMode = TRUCK
middleMouseMode = DOLLY
360° Stages
(Documentation follows)
"spaces" : [ (werden nur in 360° Szenen verwendet)
{
"id" : [number] Stageid,
"name": [string] Stagename,
"ClickSpots":
[
{
"name":"Gehe in Flur",
"position": [8.67872, 15.1609, -12.1186],
"type":"spaceChangeSpot",
"gotoSpace": [number]
},{
"name":"Zeige Lampeninfo",
"position": [-15.4345, 6.06061, 0],
"type":"infoSpot"
}
]
},

Leave a Reply