Live interaction is important these days, but content for reference and information remains just as important, regardless of time and place.
In this article you will learn how to create new content on klar.land.
It has proven useful to create a base set of documents before filling the public areas. This way, the tiles for the documents can be directly included later. In addition, all users of a workspace receive a daily summary of activities via email. So if you add users first and then create the documents, the users will be informed about all these documents.
What is a document on klar.land?
We refer to all types of content as a document, except for text written directly in clear.land in the HTML editor.
Examples of the use of documents on klar.land are:
- Presentations
- Videos
- Images
- Price lists
- Brochures
- Technical data sheets
Documents are displayed to visitors in a separate display box when they click on a corresponding tile in the workspace.
How do I add a document?
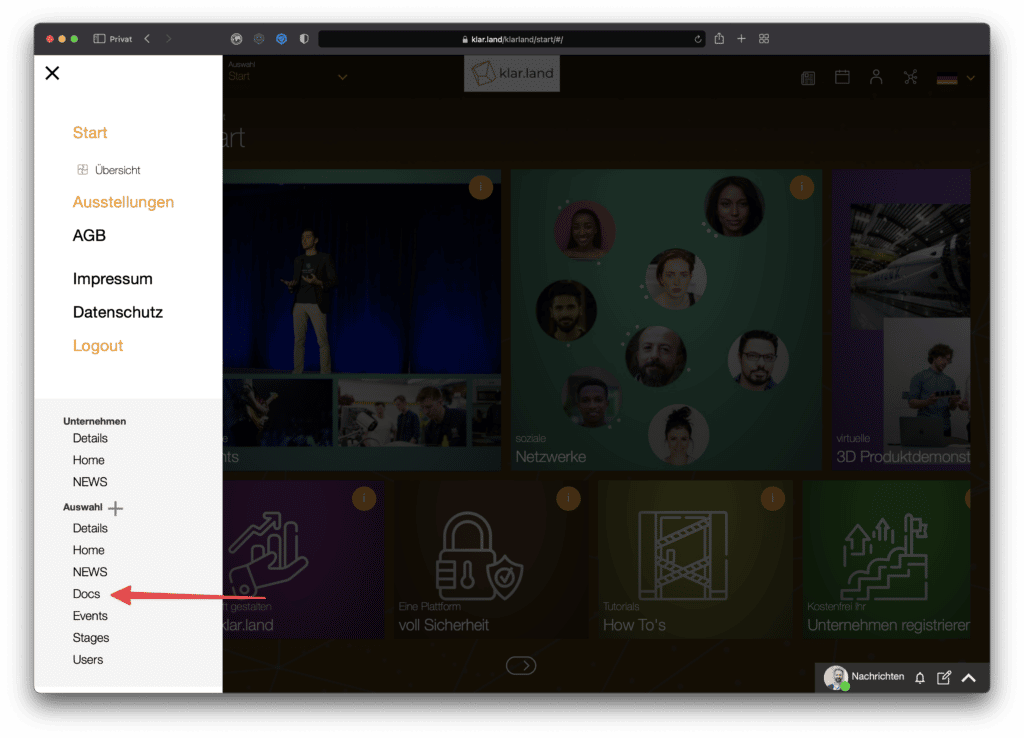
Before document tiles can be displayed on klar.land, the content must be created by an administrator. This is done in the “Docs” section of the Pages menu under “Selection”.
Clicking on the “+” in this area will create a document. It does not matter what type of document it is. To show users the created document, a tile will be set up later in the workspace that links to this document. You can read how to do this in the tutorial“Linking content in the workspace“.
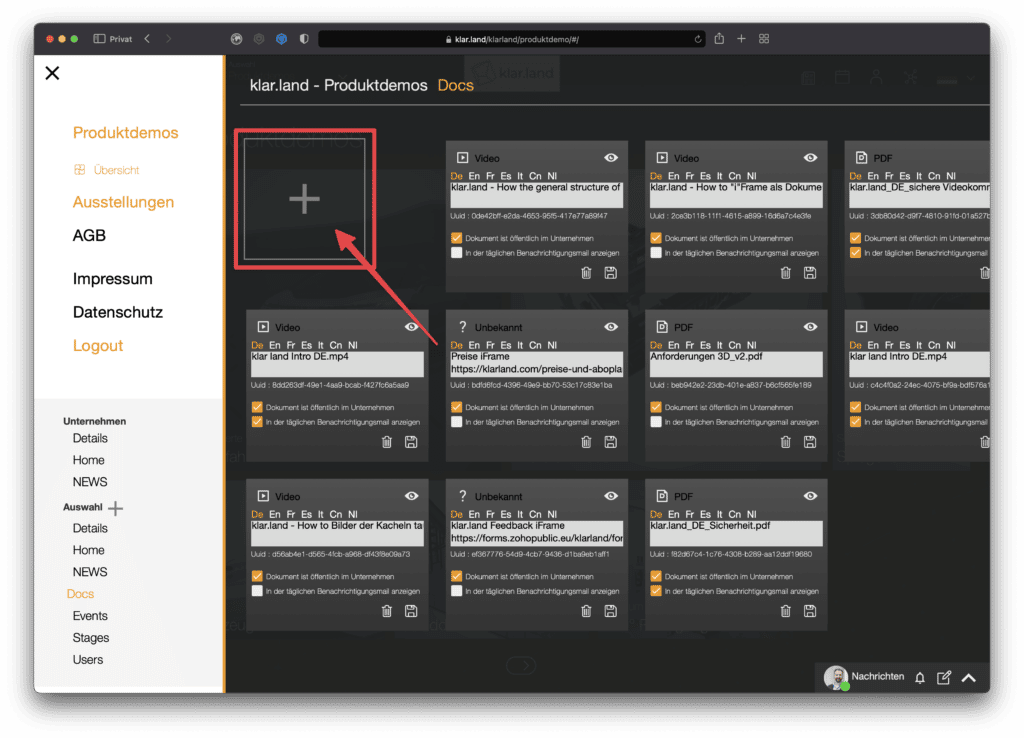
First, the document setup is completed. After clicking the “+”, a field will be created for the new document, where you can enter the details.
To add the document, move the mouse over the edge of the document field. The background color changes from dark gray to white. If you click on the field now, an explorer window will open
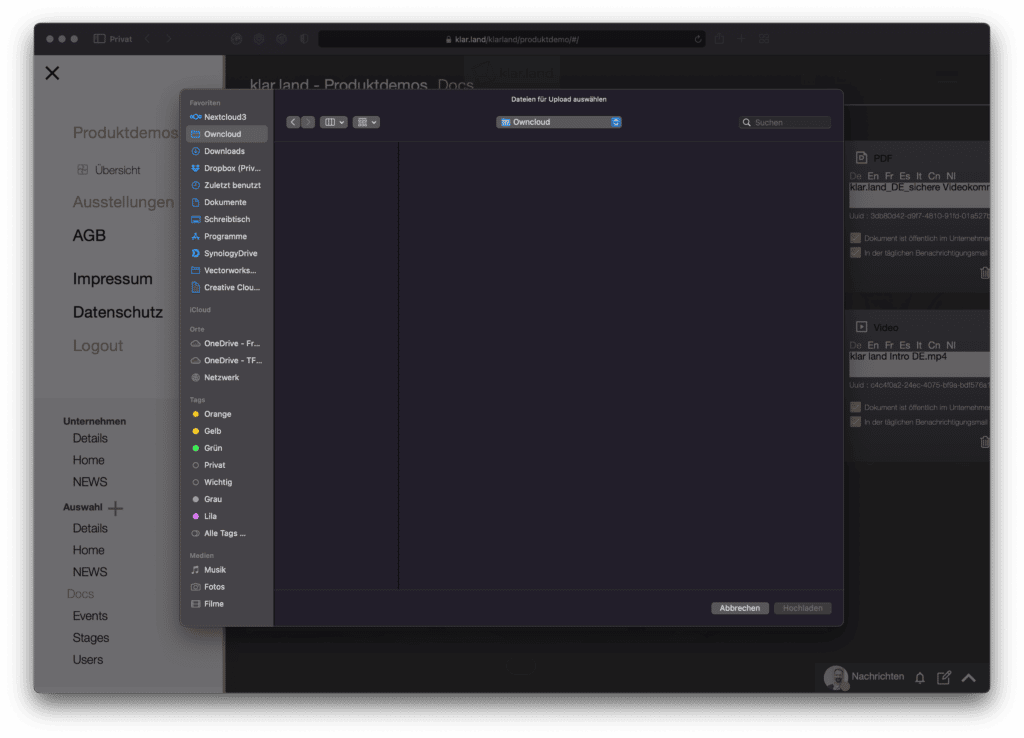
and you can select a document or an image from your computer. It is also possible to drag and drop the document onto the document field. Make sure that the tile turns white before you let go.
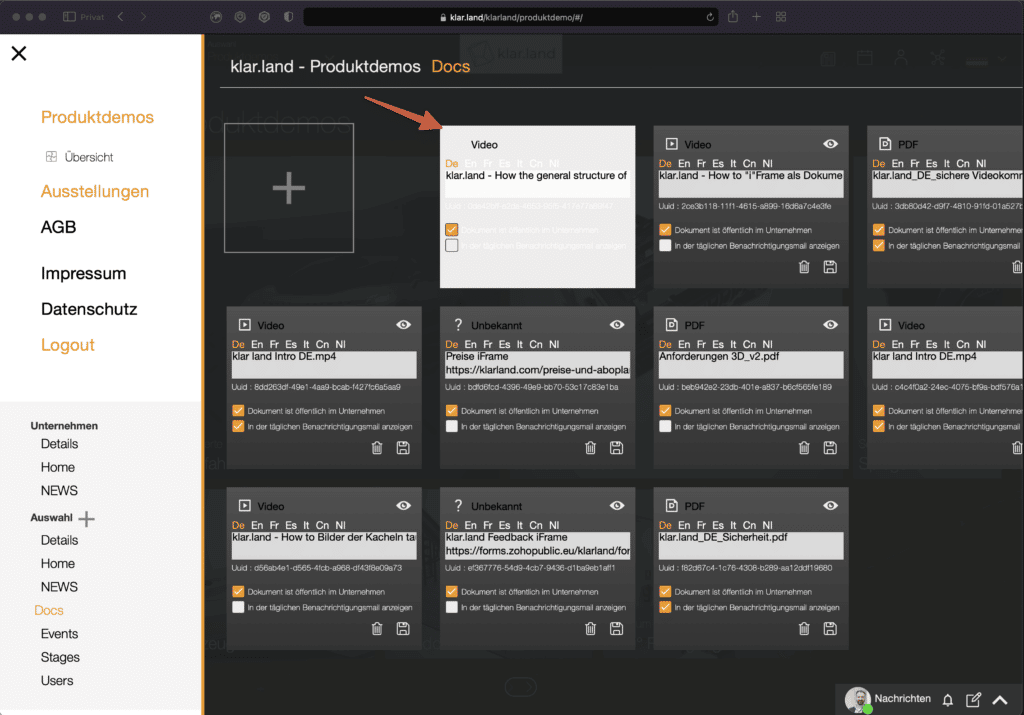
Now the file name will automatically appear in the “Name” area of the document field. This way you can make sure that you have uploaded the correct file. Clicking “Save” will start the upload process and your file will be saved. During the saving process, the document field becomes slightly darker. As soon as the saving process is finished, the document field becomes dark gray again.
You can preview the document by clicking on the eye icon in the upper right corner.

What types of document can I insert?
The following file formats are recognized as documents on klar.land:
- Document: pdf
- Images: jpg, png
- Videos: mp4
In the upper left corner of the document field you can see which document type is stored.
How do I set up the document details?
After you have uploaded the document, you can now enter the remaining details.
Name
The “Name” field was automatically filled with the file name. You can now customize this name to make it more unique for users.
UUID
Each document has a UUID (Universally Unique Identifier), which is a number that uniquely identifies the document. This field is filled automatically and cannot be changed by you.
The UUID is needed, for example, to trigger follow-up processes. Triggers can be set via Zapier, which are triggered when a user has viewed a certain document.
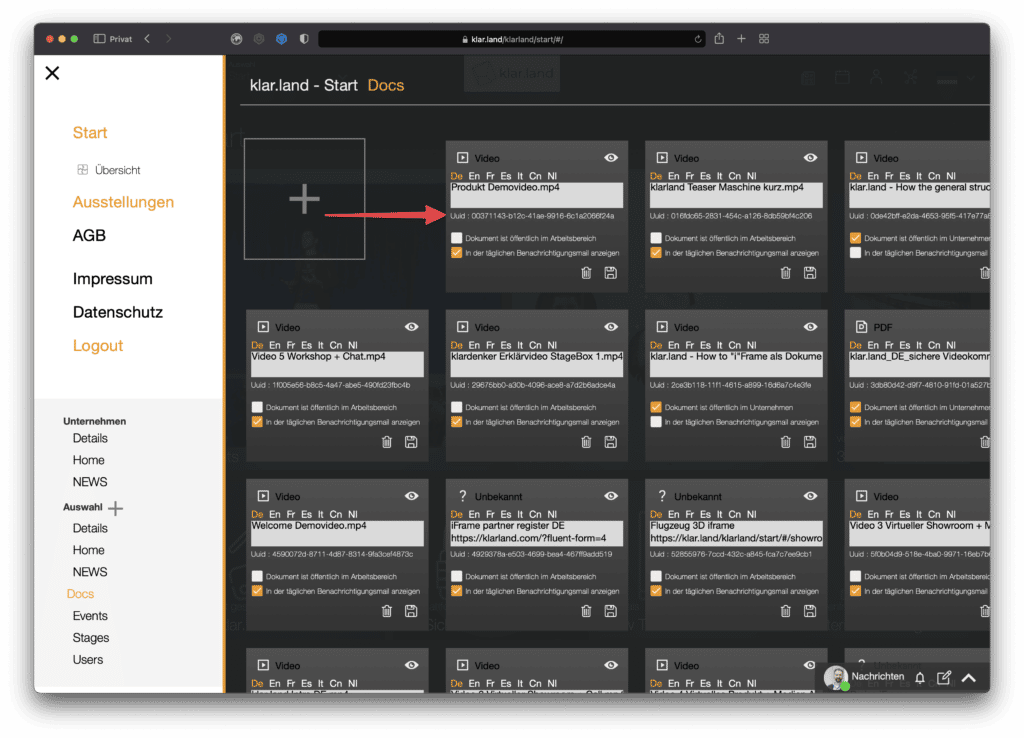
Visibility
Basically, uploaded documents are publicly visible in the current workspace. By clicking the checkbox in the lower right corner, you can make the document visible to all workspaces in the company.
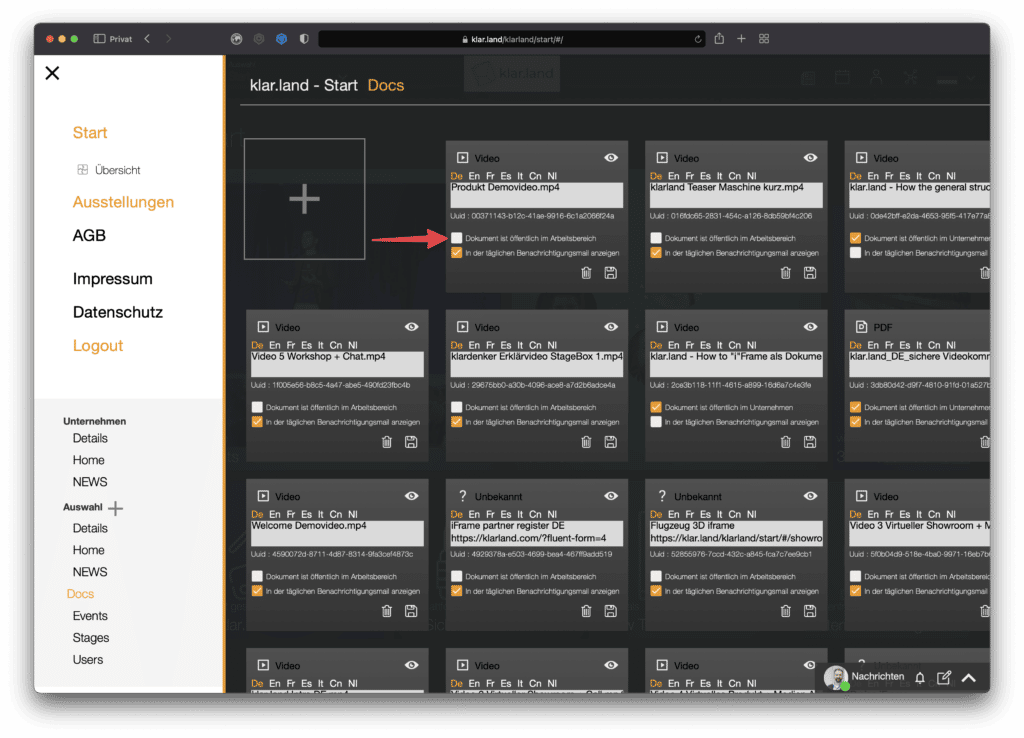
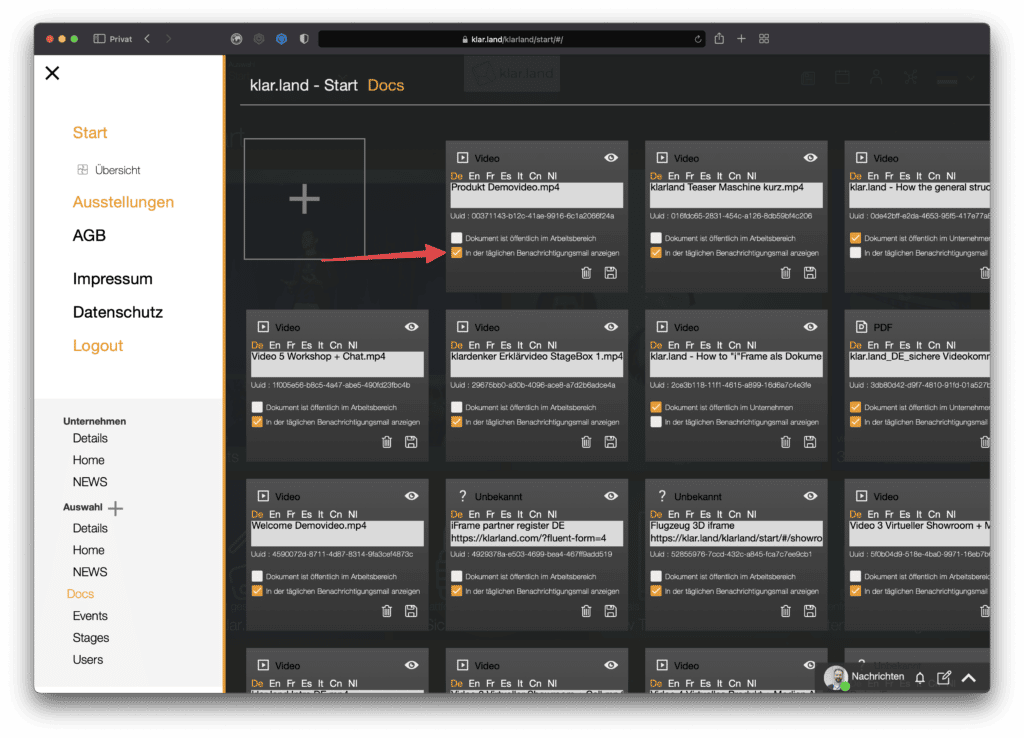
Automatic email notification
If you check the box at the very bottom, all users of the workspace will be informed about the new document in their daily notification mail.
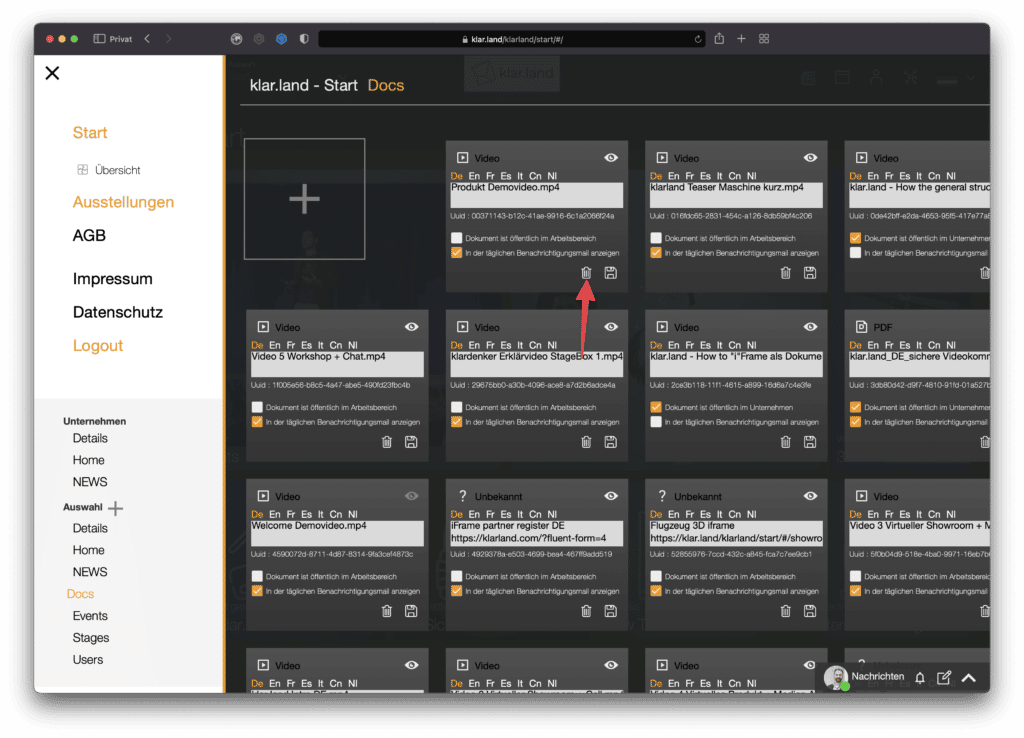
Delete
Click on the trash can icon at the bottom right to delete the document field including all information. Please note that a tile you created in the workspace for this document will persist. This can then be linked to another document or deleted as well.
How do I store documents in different languages?
A separate document can be uploaded for each language. To do so, click on the abbreviation of the language (e.g. Fr for French) and upload the corresponding document as described above.

Once an English document is created, it is used as the default for all other languages (except German). For example, if you have not created a Chinese version, users with Chinese profile or browser language will see the English language document.
For companies with international contacts, it therefore makes sense to file at least one English document.
How do I embed an iFrame?
There is also the possibility to include iFrames. This allows you to link to external forms or content on other websites.
To do this, give the new document a title that includes the word iframe. Directly below, in the same text box, paste the embed code.

After you save, you will see a question mark for “unknown document” in the upper left corner. This is normal and unproblematic. If you click on the eye icon, you will see a preview of the linked page.
How do I embed external links like Youtube videos?
If you want to embed a YouTube video via iFrame, go to the corresponding video in YouTube and click “share”.

Attention: Do not simply copy the displayed link now, but click on the “embed” icon

and copy from the displayed code the part that starts with https://www.youtube.com/embed/.
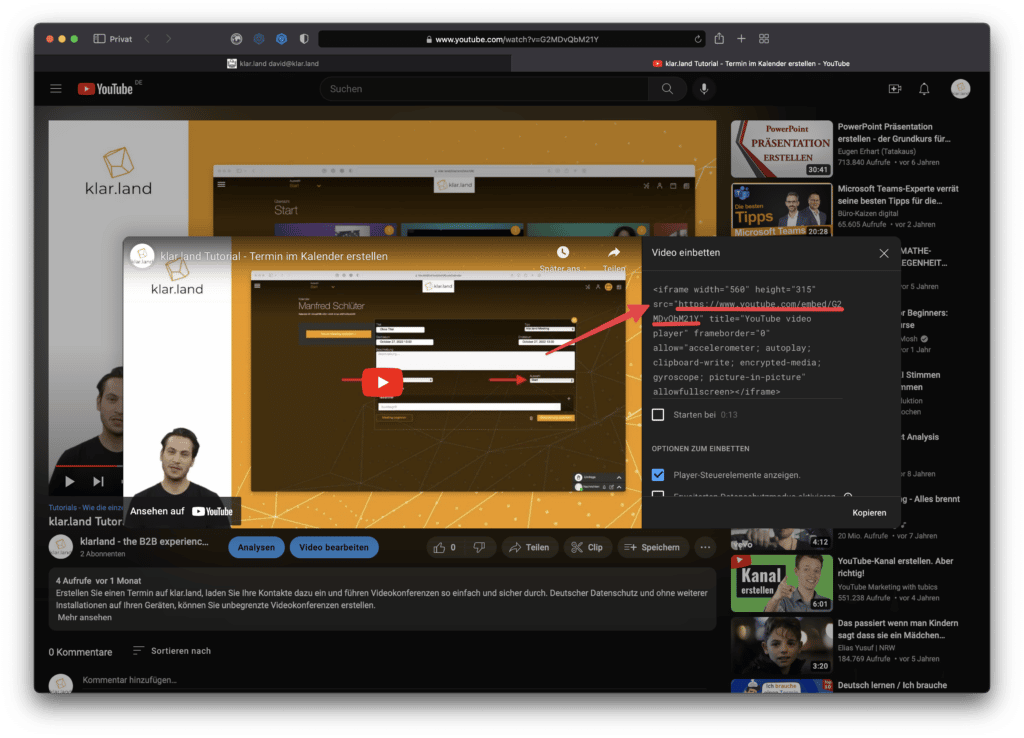
Enter this embed code in the document field as explained above.
Where do we go from here?
Once you have created the documents you want, the next step is to create tiles in the workspaces that link to those documents. You can read how to do this in the tutorial“Linking content in the workspace“.
