In this tutorial we will show you how to set up your company area in klar.land and design it according to your wishes.
After you have registered your company on klar.land (more about this in this tutorial), you now set up your company area.
The details of the company as well as the home screen and news of the company can only be changed by users who have owner rights for at least one workspace of the company.
Editors can only modify the data of the workspace for which they have editor rights. You do not see the menu for companies in the sidebar.
Basic setup for any business:
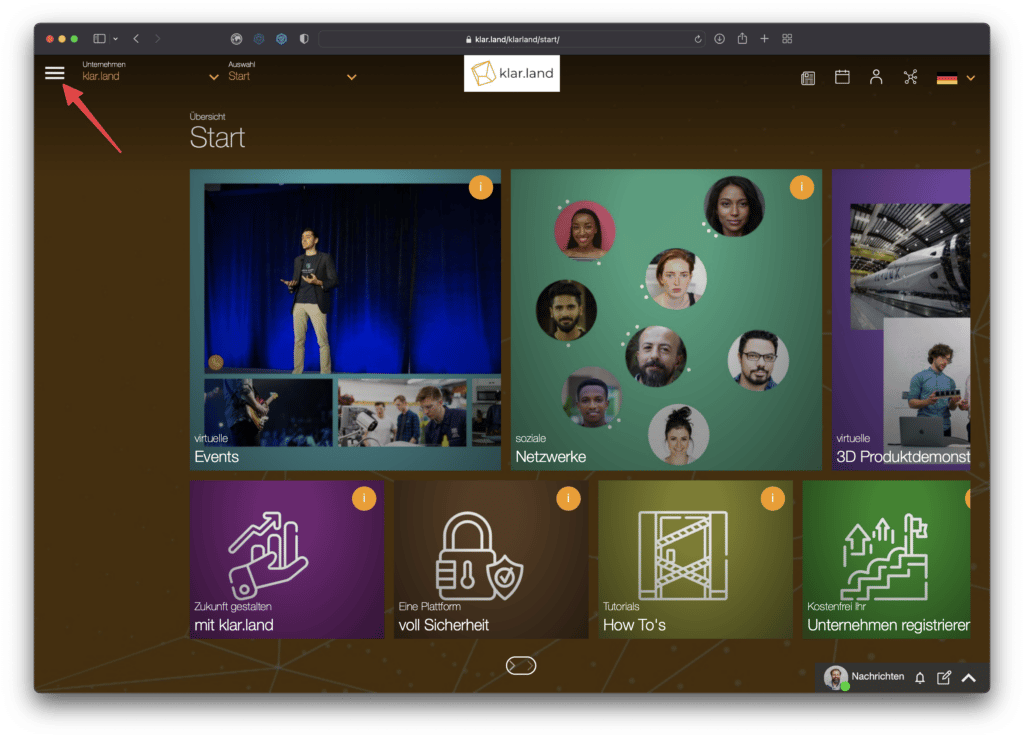
Click on the burger menu in the upper left corner.
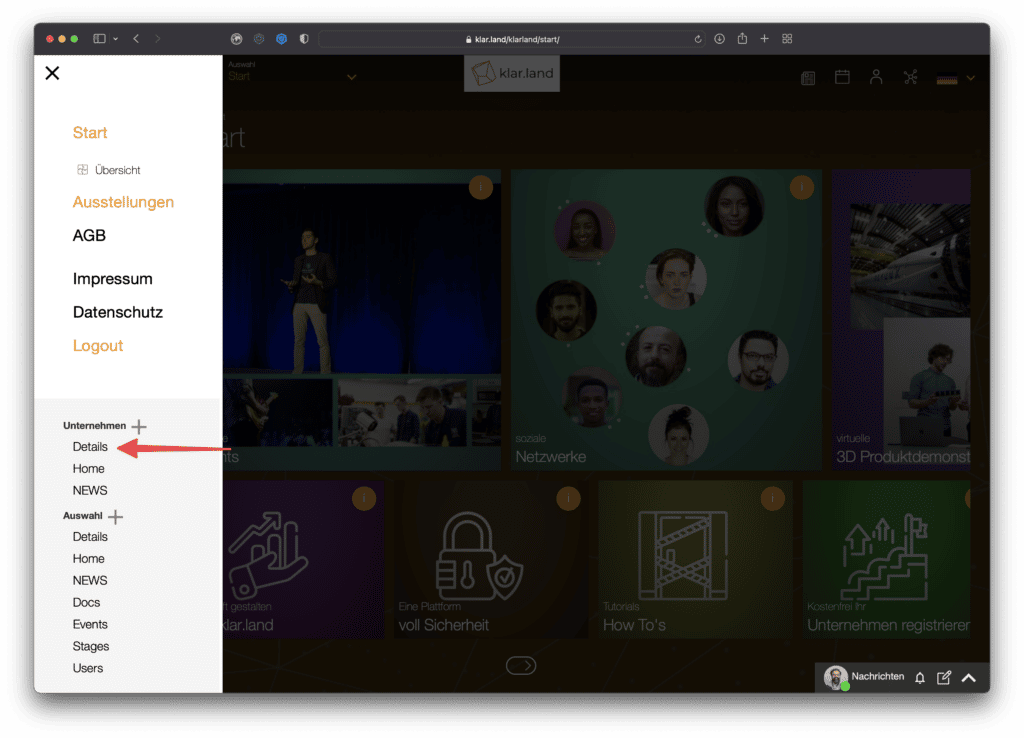
Now the side menu opens. In the “Company” section, click on “Details
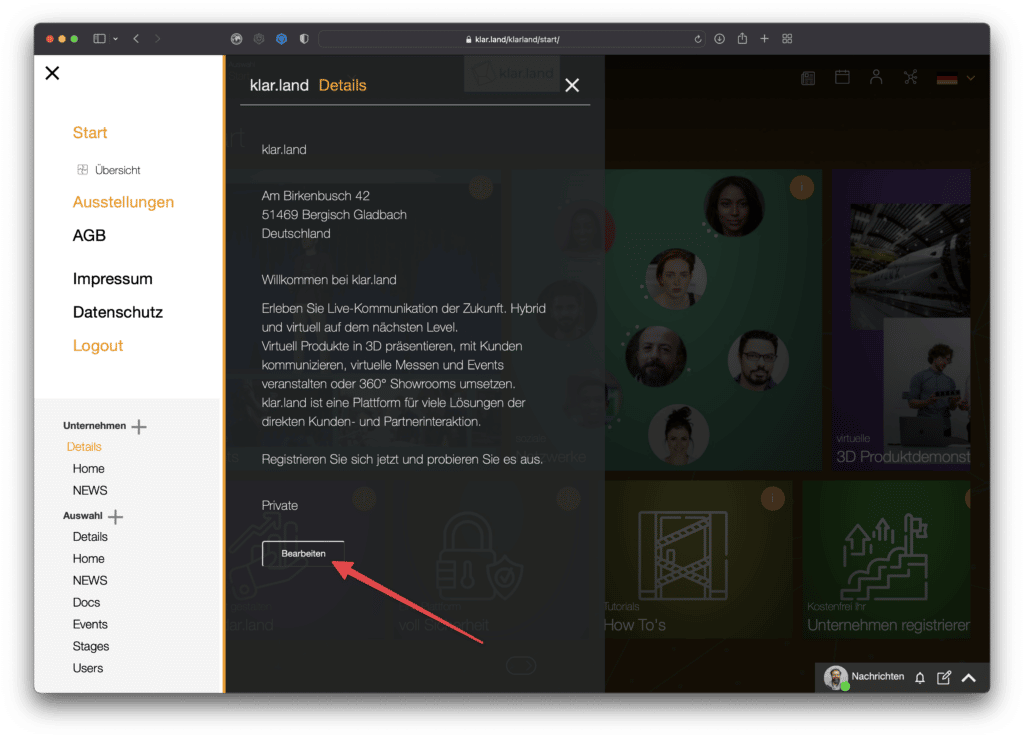
and then click the “Edit” button.
A new window will open where you can edit almost all entries.
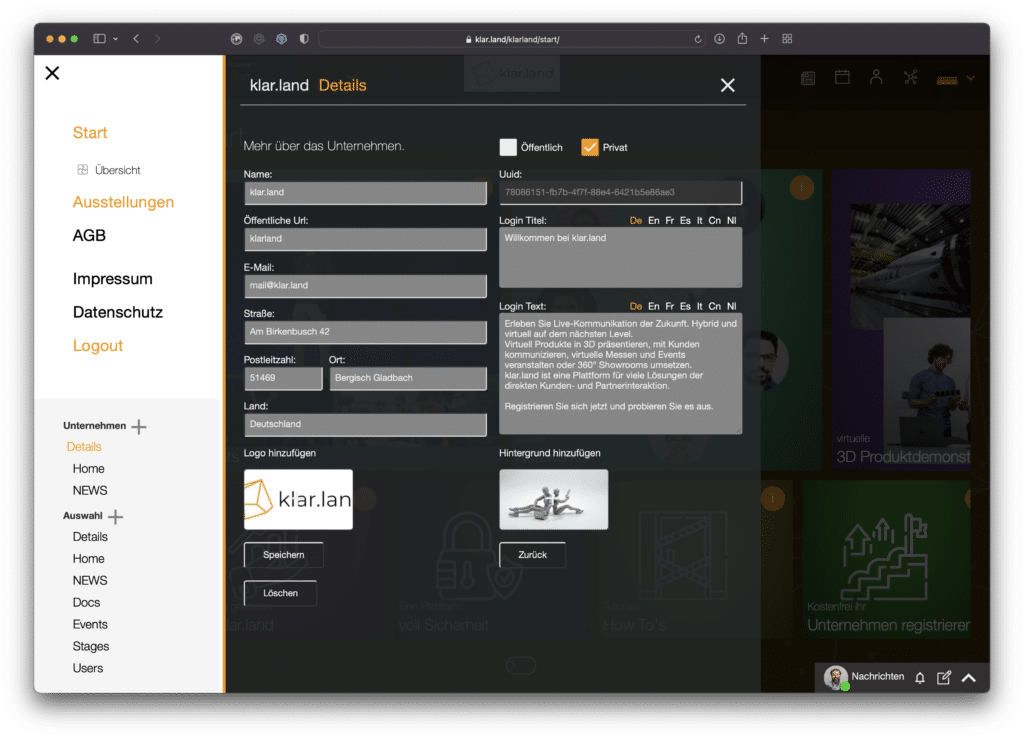
Name:
Here you can customize your company name. This is displayed in the “Company” selection list. So choose the name as you want it to appear to outsiders. For example, the correct company form (GmbH, AG, …) is not relevant as long as it is not part of your brand.

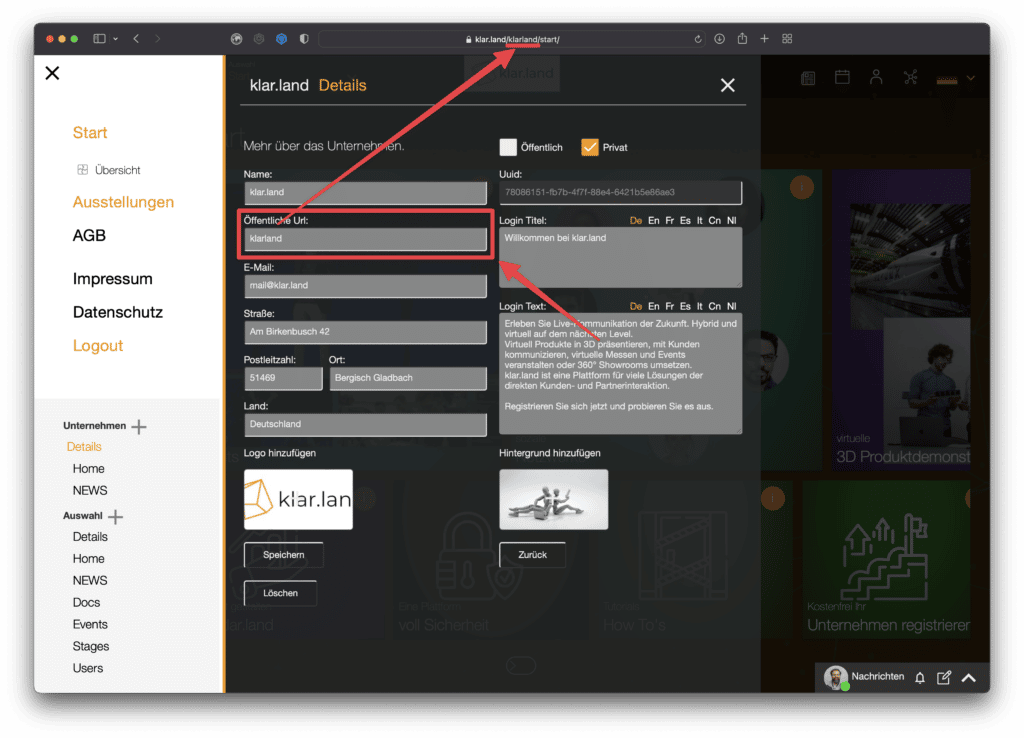
Public URL:
When you create your company, it first gets a number-letter combination as part of the klar.land URL. Here you can replace it with your company name. Alternatively, other designations are possible that make it easy for your customers to find you.
It makes sense to define this URL at the very beginning and then keep it. If you make changes later, remember to update any links you use in other places. The links within klar.land are updated automatically.
If you change the URL, please do not continue editing immediately. First click on “Save” and test the new URL: either by typing it directly into the browser, or by switching the company area and coming back.
This way you can make sure that everything works before proceeding with further editing.
E-mail address:
Enter here the e-mail address to be used for general inquiries by customers.

Address fields:
You can fill in the postal address (street, zip code, city, country). However, these data are not used anywhere at the moment. For the future it is planned that the address can be published so that companies can be found through it.

Visibility:
At the top right you can set your company to “public” or “private”.
“Public” means all users of klar.land can find you and access your content. You can still decide for each area within your company whether it is public or private.
“Private” means that your company will not appear in the “Company” drop-down list (except for users to whom you have granted access to your company).

Uuid:
This is the only field that you cannot edit. The Universally Unique Identifier address (Uuid) is assigned by klar.land when the company is created and always remains the same. However, you can copy them and save them in your own files.
The Uuid is needed to uniquely identify your company within the klar.land platform. When you contact support with a problem, this makes it immediately clear which company you are talking about (if, for example, you manage “Metzgerei Schäfer”, of which there may be several).
If you are working with an interface like Zapier or similar, they need the Uuid. Also the Uuid is needed if you want to create 3D elements.

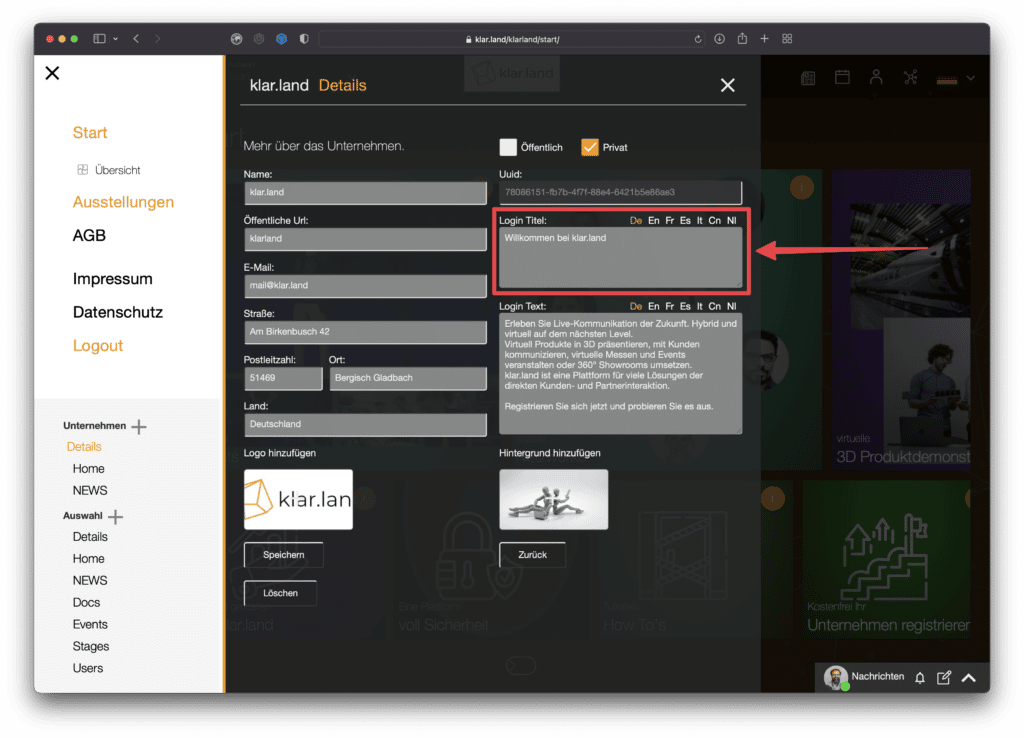
Login Title:
Here you define the headline of your welcome text.

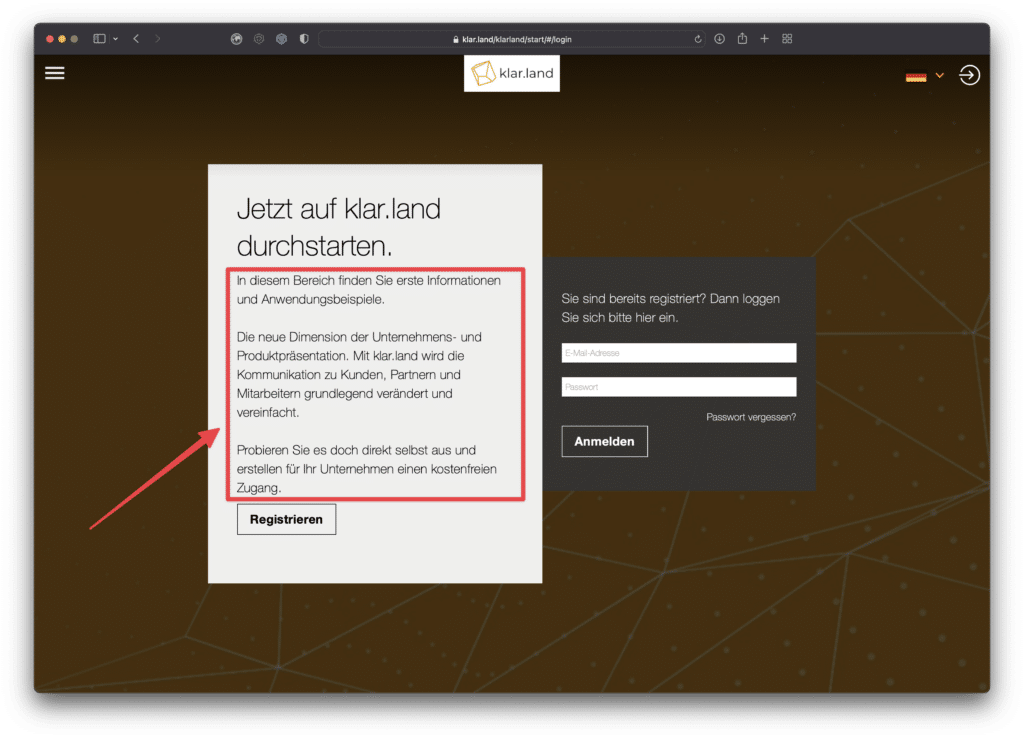
Login Text:
This text is displayed to visitors who click on your company profile, where they can then either register or log in.
So it’s best to choose a short text that introduces your company and makes it clear to users why it’s worth visiting your section in klar.land.
You can change the language of the login title and text. To do this, click on the language abbreviation on the right above the text field. The page reloads as the entire company profile (in your administrator view) is changed to the new language. So go to “Company” and “Details” in the side menu again to continue editing. Now you can enter the text in the other language.
If you enter an English text, it will automatically be used for all other languages until you enter your own texts for them as well. So we recommend all companies with international visitors to set up at least a German and English text.

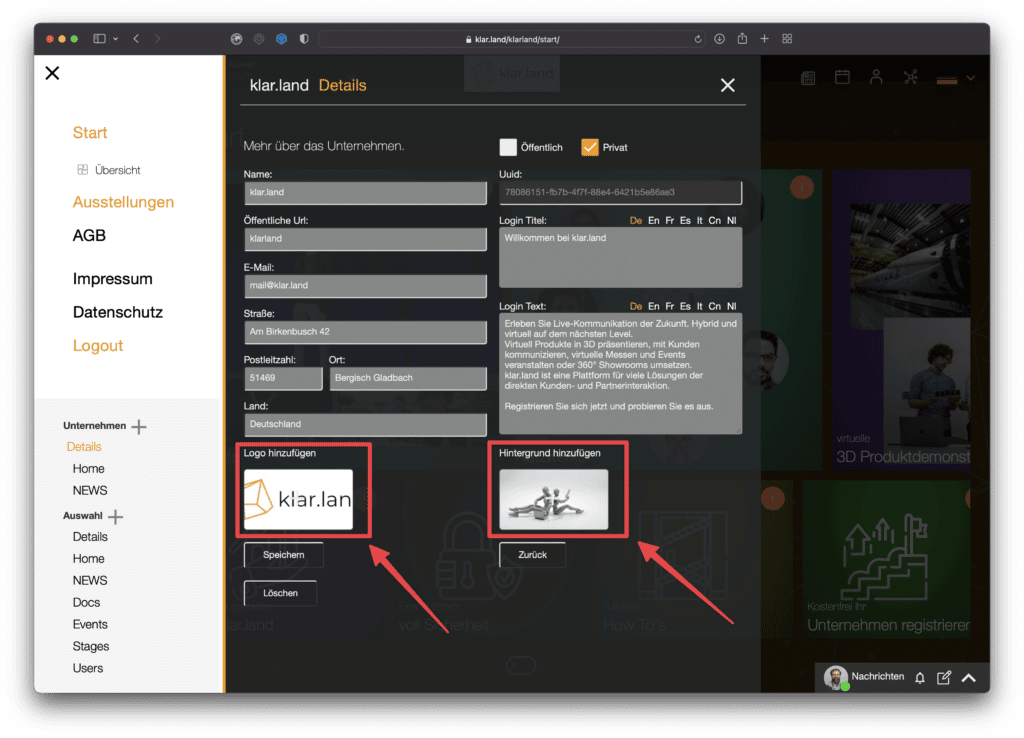
Logo and background image:
At this point you can also set up the logo and the background image for the company. These are displayed when visitors are on the company’s home page.
You can add the corresponding images or logo files either by clicking on the plus icon, or simply by dragging and dropping them into the appropriate area.
Finalize facility:
When you have entered all the data as required, click the “Save” button at the bottom left.

You now have the basics in place and can start adding content to the business section.
Set up company home page
By default, visitors are first shown the “Home” section of your company. You can also select a different workspace as the default. You can read more about this below.
The home page has the background image they selected in the company details and shows your logo at the top center.
Additional content is linked here via tiles. These links may lead to other areas within klar.land, or to external pages.
All workspaces are automatically created as tiles. However, only the workspaces for which the user has access rights are visible to the user. The interface thus adapts flexibly to the respective user.
The tile uses the background image of the workspace. If you have not stored an image, one of the standard klar.land motifs will be used.
In addition, other custom tiles can be created on the company’s home page.
Add individual tiles to the home page
To do this, go to the menu on the left to Company > Home

and click the plus icon.

A form for creating the tile will open.
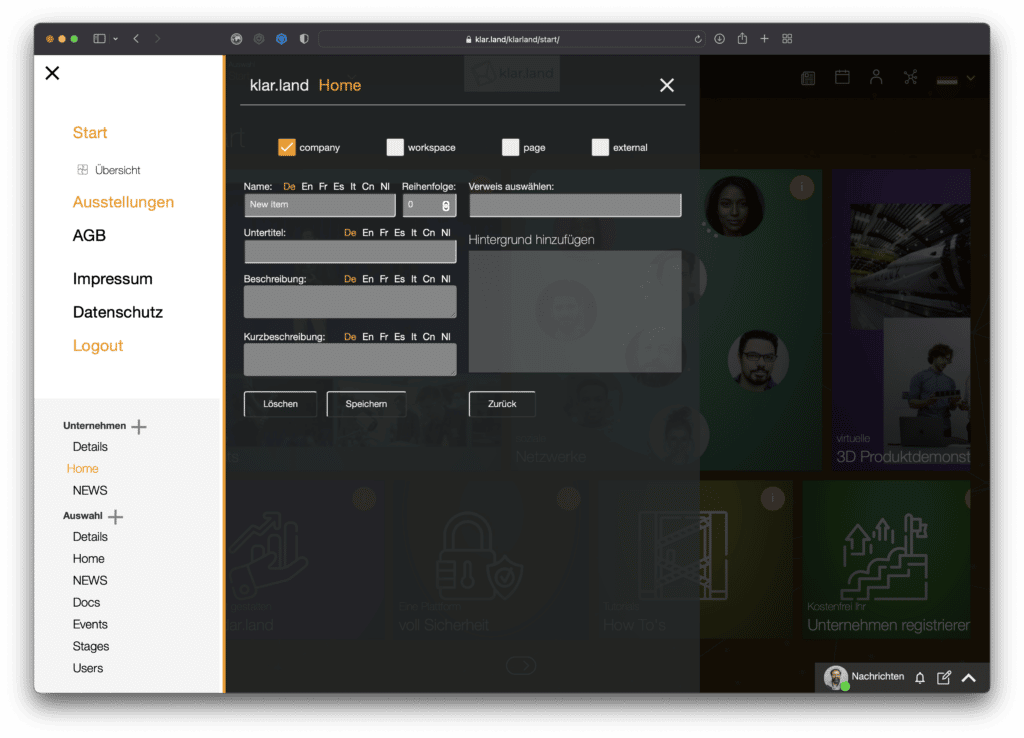
You have the following options here (boxes in the top line):
Company:
Use this option for links to another company within klar.land. This could be a partner company, for example. To set this link, you need (at least temporarily) owner or editor rights in the linked company.
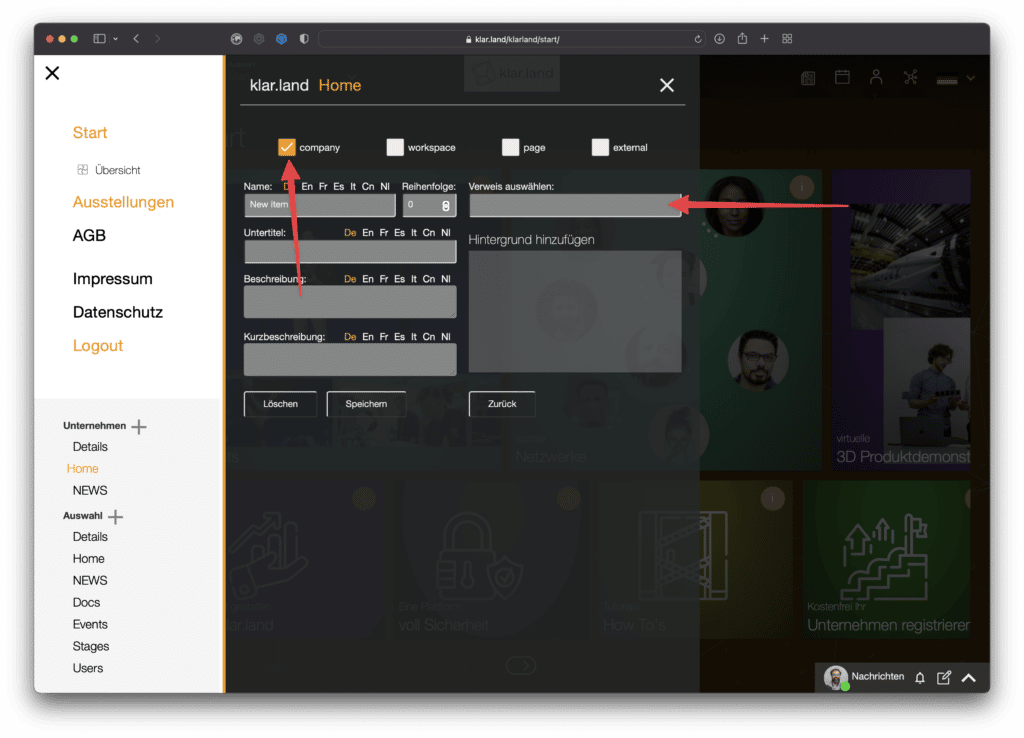
Select “company” and then click in the “Select reference” field in the right column. Now a “Picker” appears with a list of all companies for which you have the corresponding rights.
Workspace:
Link workspaces here that should be made available to all visitors after registration. These can also be workspaces from other companies, as long as you have the appropriate rights for them.
Select “workspace” and then click in the “Select reference” field in the right column. Now a “Picker” appears with a list of all workspaces for which you have the corresponding rights.

Page:
This allows you to create subpages of the home page, which then contain several tiles. This is suitable for structuring larger amounts of data.
The “Select reference” field is not relevant for this.

External:
Use this option to link to an external page, for example, your own company website, trade show websites, or interesting blog articles.
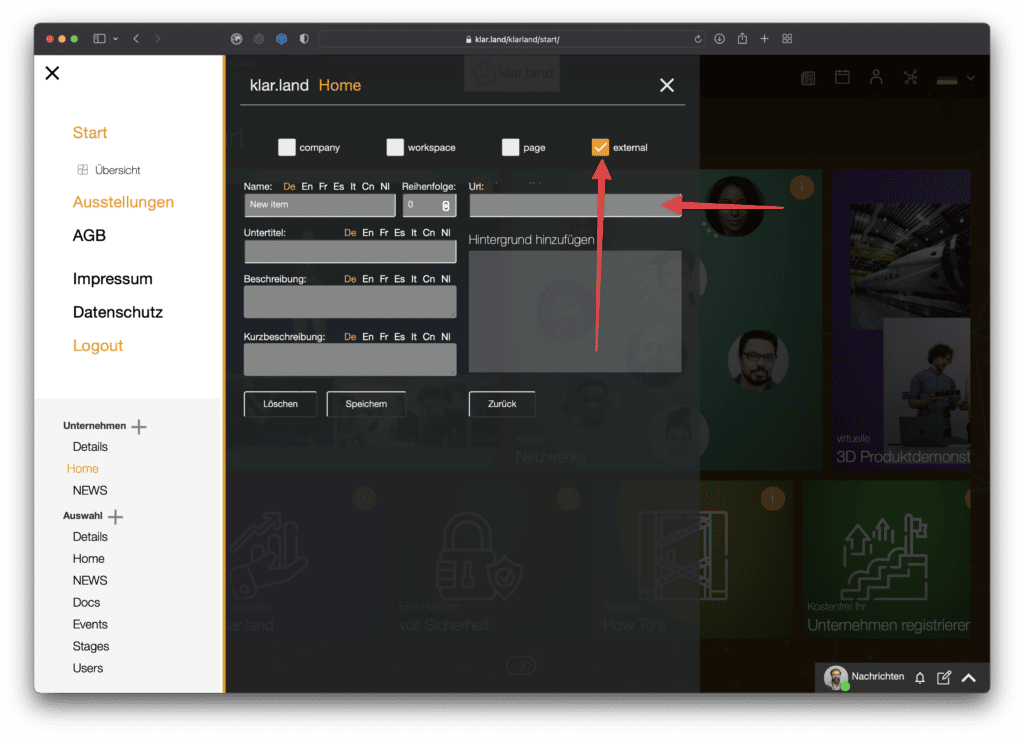
To do this, select “external” and enter the exact URL of the external page in the “URL” field.
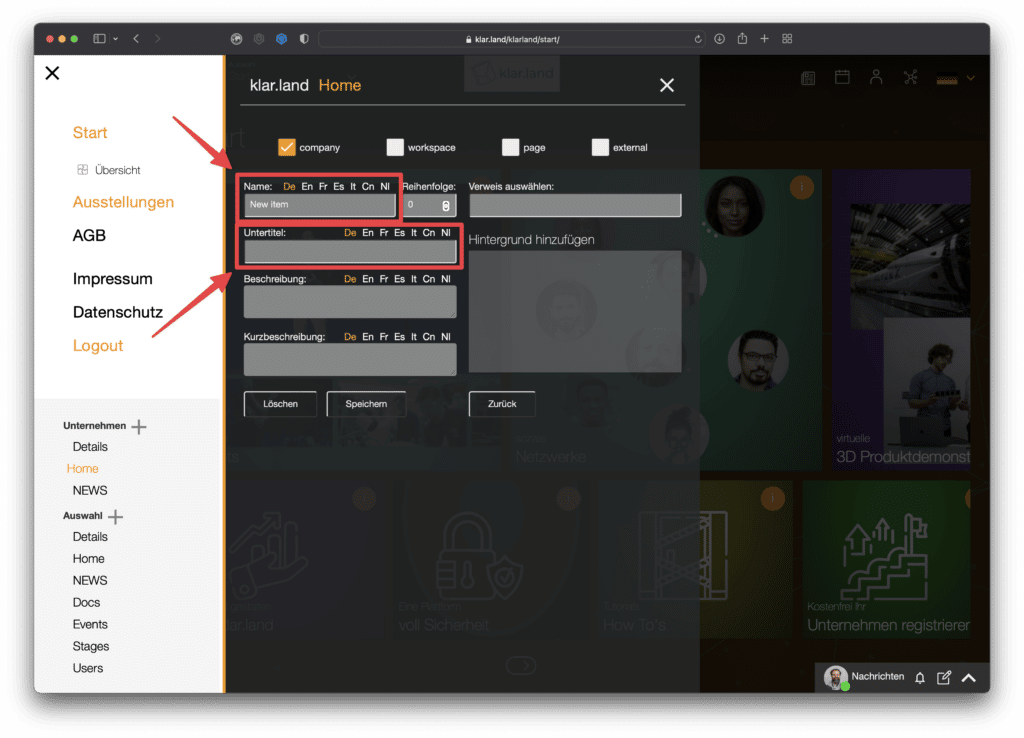
The following input fields are available for all types of tiles:
Name and subtitle:
When displayed on the tile, the subtitle is displayed slightly larger. So if you use both, please write the more important information in the subtitle.

Order:
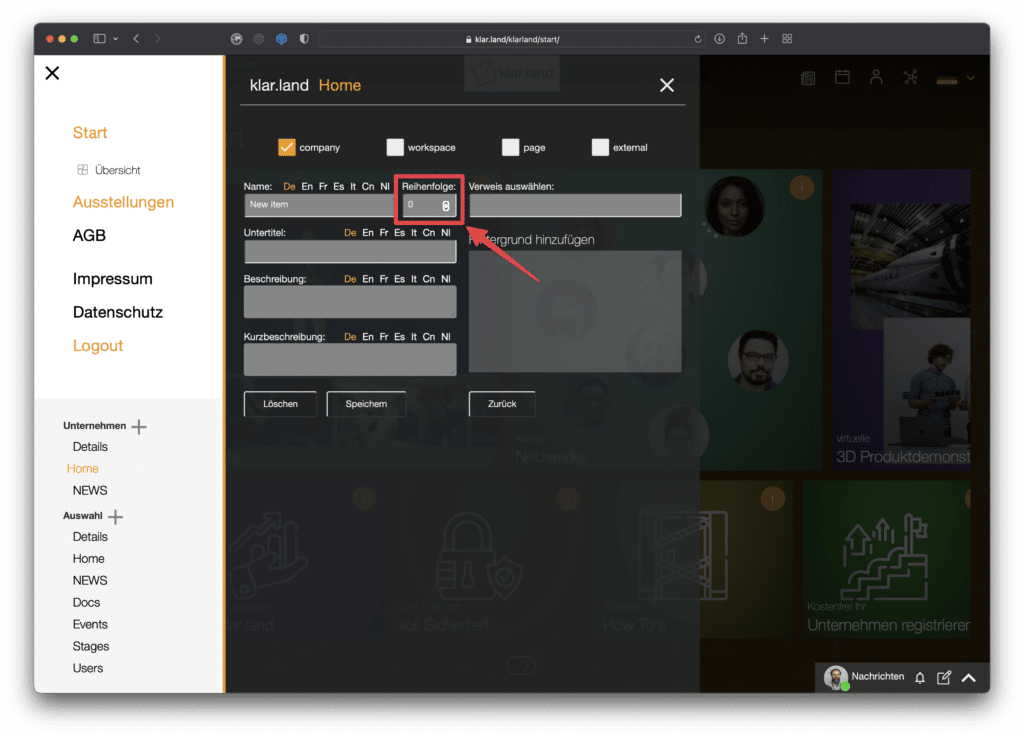
Here you can set the order of the tiles. To do this, simply specify the number of the position where the tile should be located. The system automatically positions the tile for Workspaces first, then the other tiles follow in the order you specified for them. The line break is done automatically.
Pro tip: Proceed in increments of ten when creating. This way you will have the possibility to insert new tiles between existing ones later without having to change everything. Don’t worry, the missing positions will not be visible as a gap or anything like that.
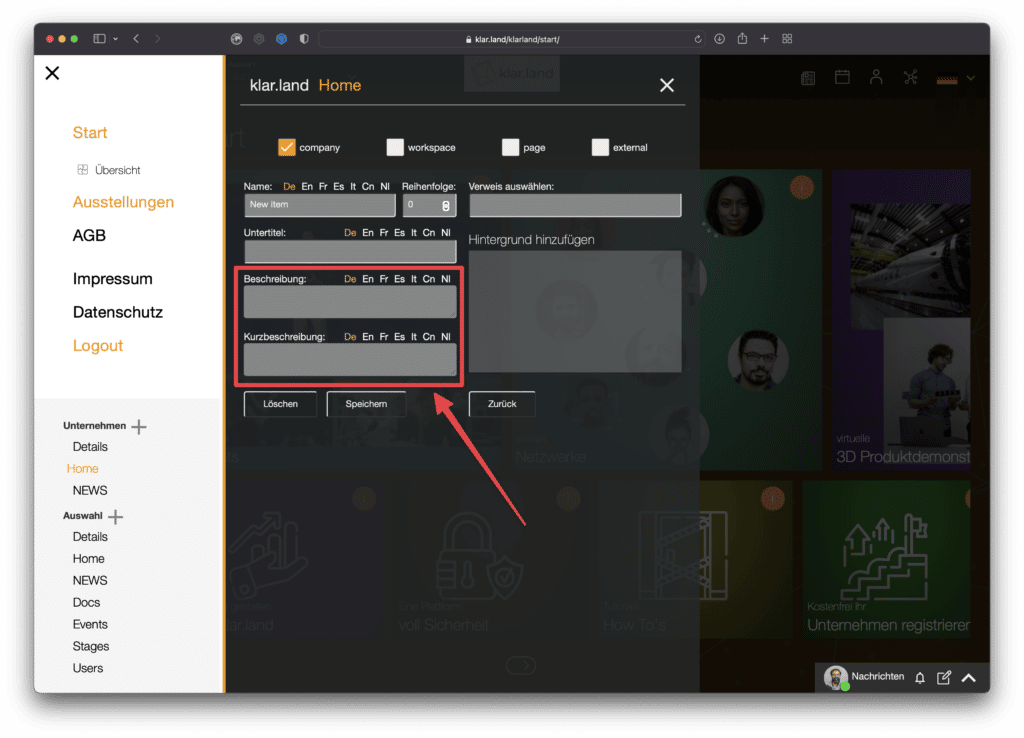
Description and brief description:
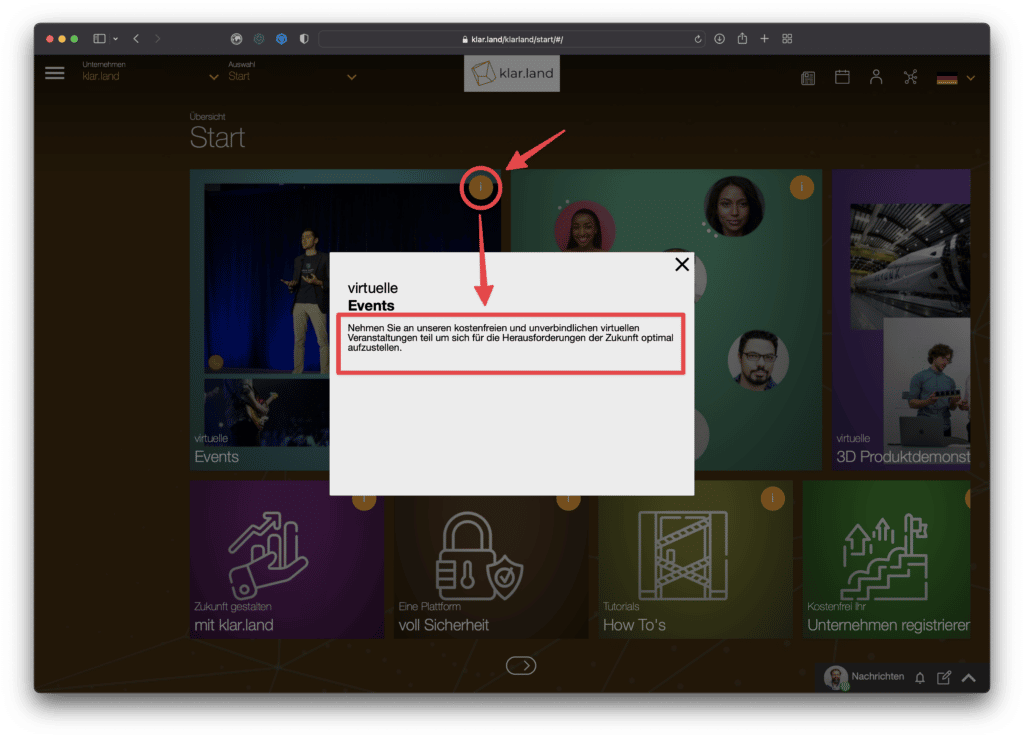
These are displayed when someone clicks on the (i) in the upper right corner of the tile. Use the descriptions to provide a brief summary of the content you are linking to.
Delete:
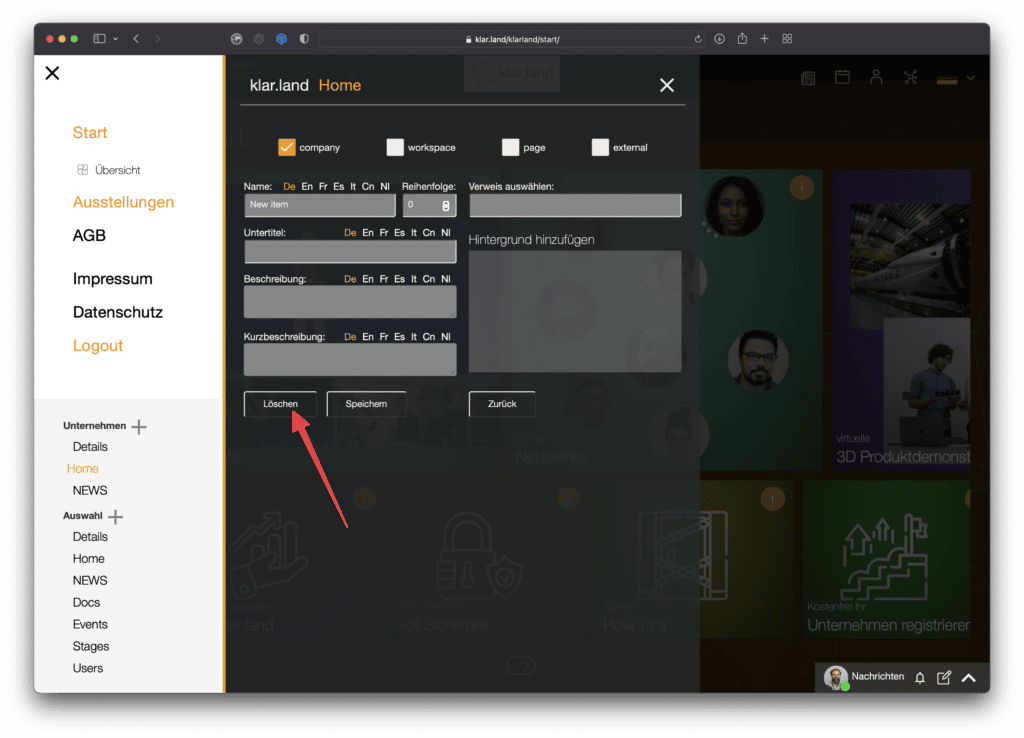
Use the “Delete” button at the bottom left to delete the tile. It will be automatically removed from the home screen as well.
Set alternative start area
Instead of the default start screen (“Home”), you can also set another workspace as default. As a result, all visitors land directly in this workspace. The “Home” area (previous start screen) remains accessible for the administrator.
To do this, go to the corresponding workspace and then click Selection > Details in the side menu.
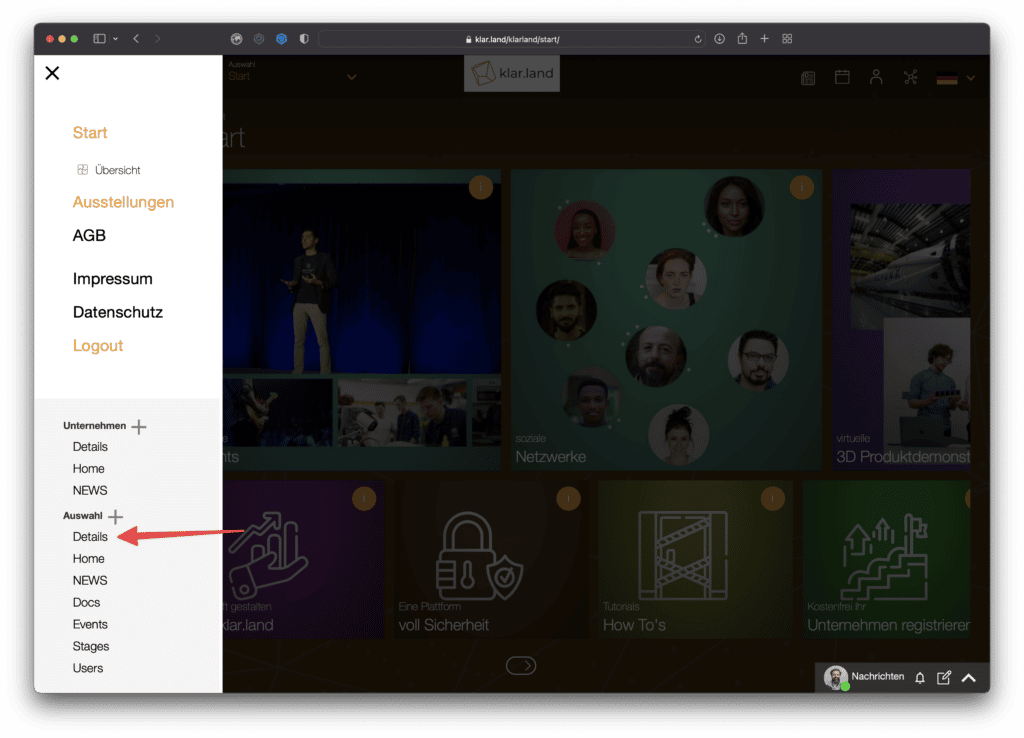
The form for the workspace settings opens.
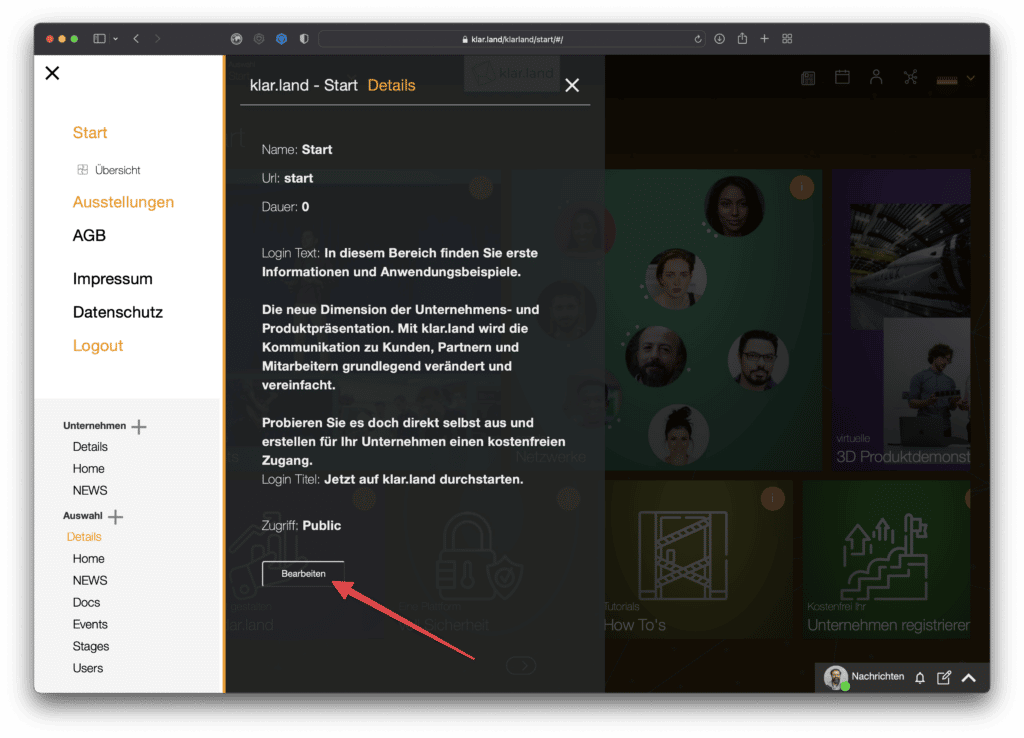
Here you can check the “Set default” box at the bottom right.

Please note: This automatically makes the workspace “public”. This is then also visible for users who are not logged in. As soon as users click on a tile for an area that has restricted access, they get a prompt to register or log in.
To set the default home screen again, simply uncheck “set as default” in the other workspace.
