In this post, we’ll show you the options for adding new users to your spaces and how to invite new users so they can access your workspaces on klar.land.
Here you will find information about the various rights of users.
There are several ways to invite users to klar.land and give them access to Workspaces.
You can access the user administration via the “Hamburger” menu at the top left. The page menu opens. At the very bottom you will find the item “User”.

Single invitation:
First, we will show you the way to add users already registered on klar.land to your workspace one by one.
To do this, click on the “Invite” button in the user area at the bottom right.

In the new view, you can enter the name of the user you want to add to the workspace in the search field at the top. Alternatively, you can search by company name, position or any other available information.
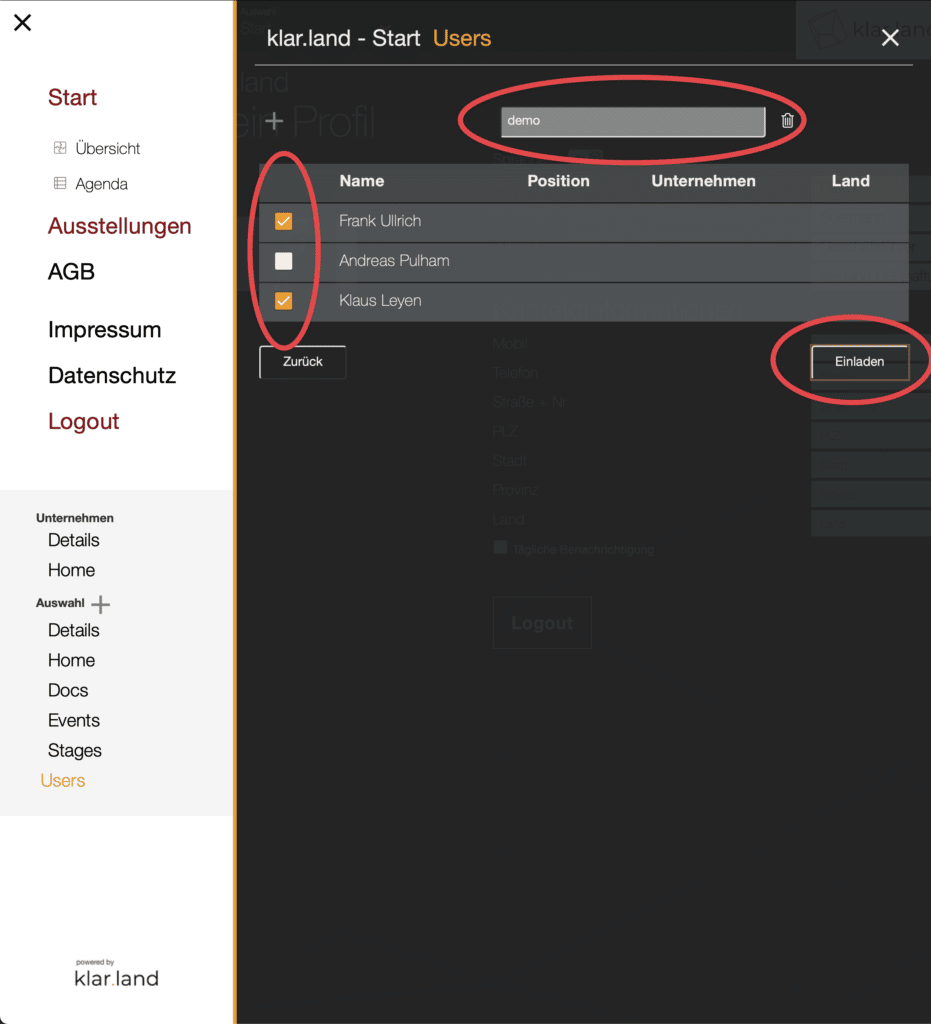
Then select the person(s) you want to invite and click “Invite”. Users will now receive an email with a link through which they confirm that they know the company and want to be added.
After clicking on the confirmation link, users are added to the workspace as a “Guest”. You as administrator can change this status later (see tutorial “User roles and rights“).
Invite new contacts
When searching for a user who is not yet registered, a window opens with the text “The user is not known to us”. This can be used to invite external persons. Only e-mail address, first and last name must be entered. Your contact will now automatically receive an email from klar.land and has the option to simply register on klar.land.
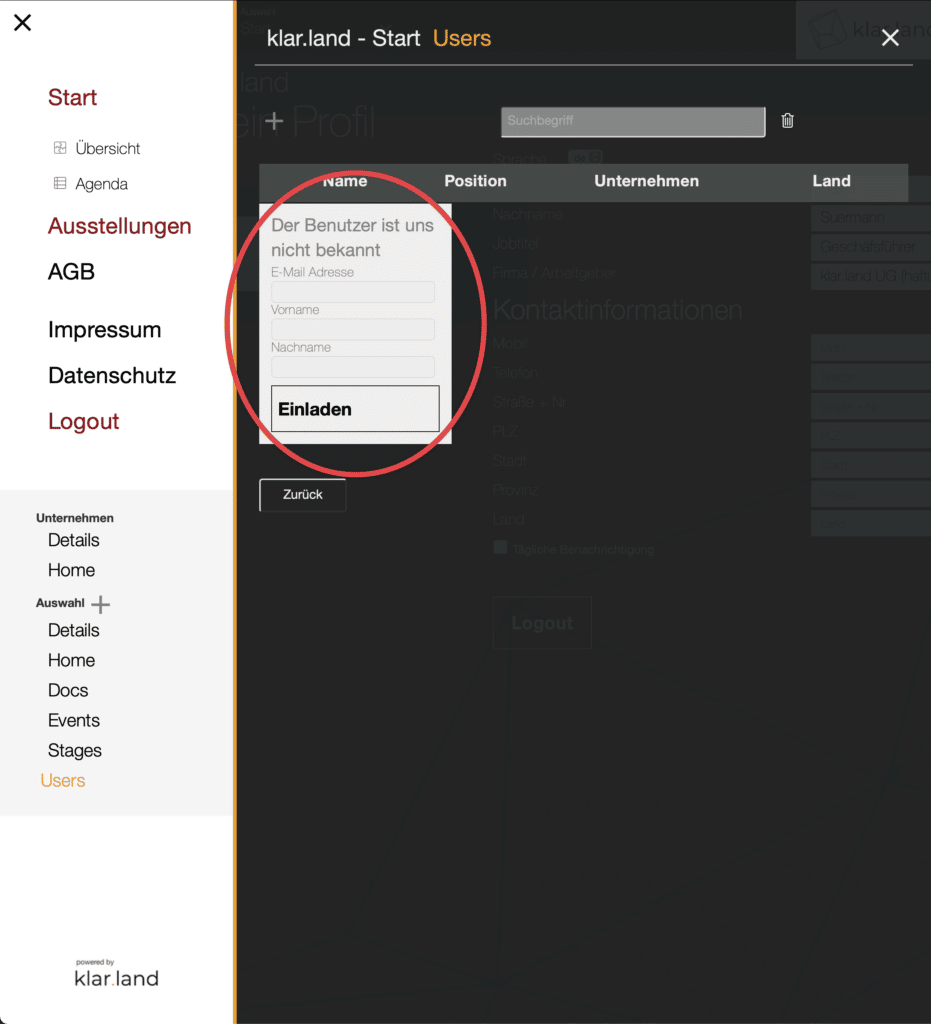
In the invitation email to your contact, you will be mentioned by name so that your contact knows why they received the email even if they have never heard of Klar.land. Upon registration, the contact is directly linked to you as a user, appears in your personal contact list and is added as a user with “Guest” rights to the workspace from which you sent the invitation.
Multiple invitation:
If you want to add several people, you do not have to enter them all individually. You also have the option to add a list of users.
To do this, also go to the “User” area and download the “Sample CSV” file above.
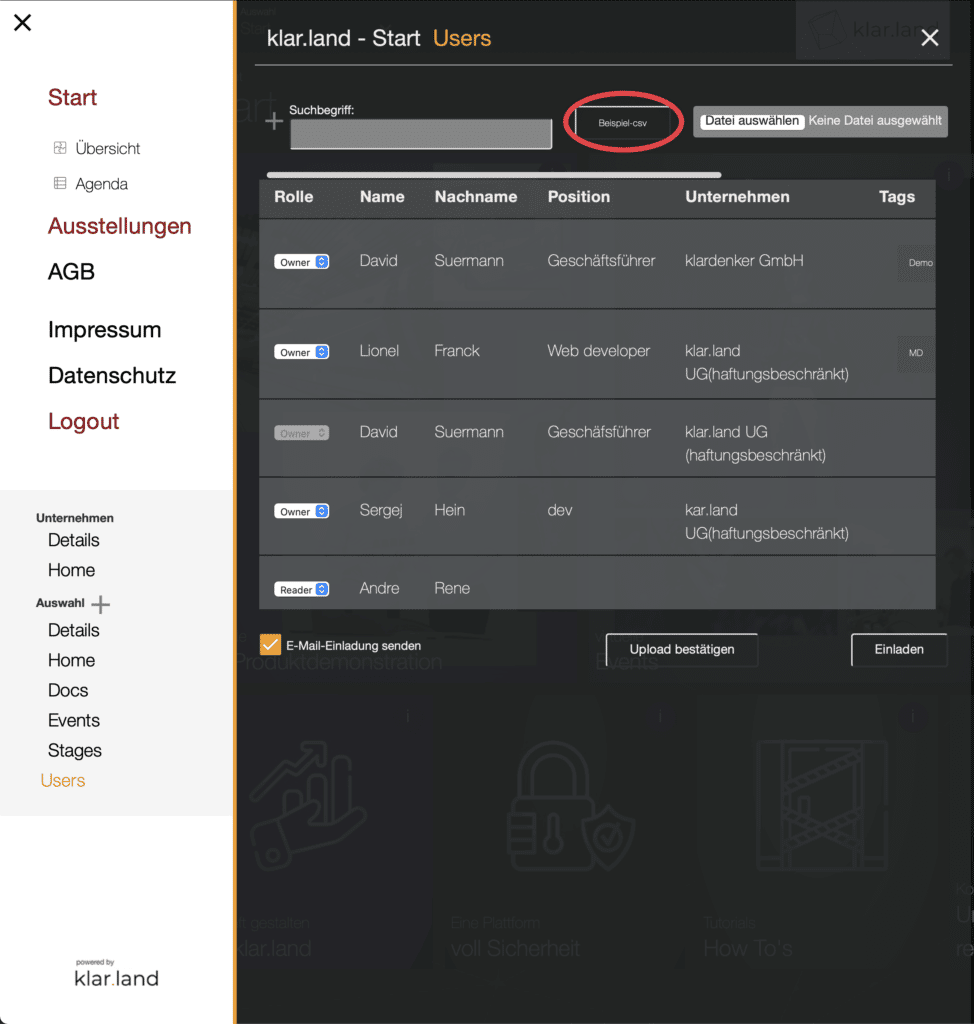
Fill in the CSV file with your contact details. Mandatory fields are marked with * in the file. You can fill in all other fields, but they are not relevant for the import.

The “Tags” column helps you to categorize your contacts. Here you can, for example, store certain interests or the name of an event where you met. If you want to add multiple tags for one person, please separate them by comma.
If you have contacts who speak different languages, you can define the language in the last column with the ISO country code. Your contact will then receive the invitation email in this language and the platform will be set up for him/her in this language immediately after login.
You can create the CSV file using Excel or any other spreadsheet editor. It is important that the file is saved as CSV in Unicode UTF-8 format so that we can read it in the system.
If your Excel version does not support UTF-8 format, you can use Google Doc to create a spreadsheet, copy your data into it, and then export it as UTF-8.
Now upload the ready file with your contacts to the system. Click “Select file” in the upper right corner and select the file on your computer.
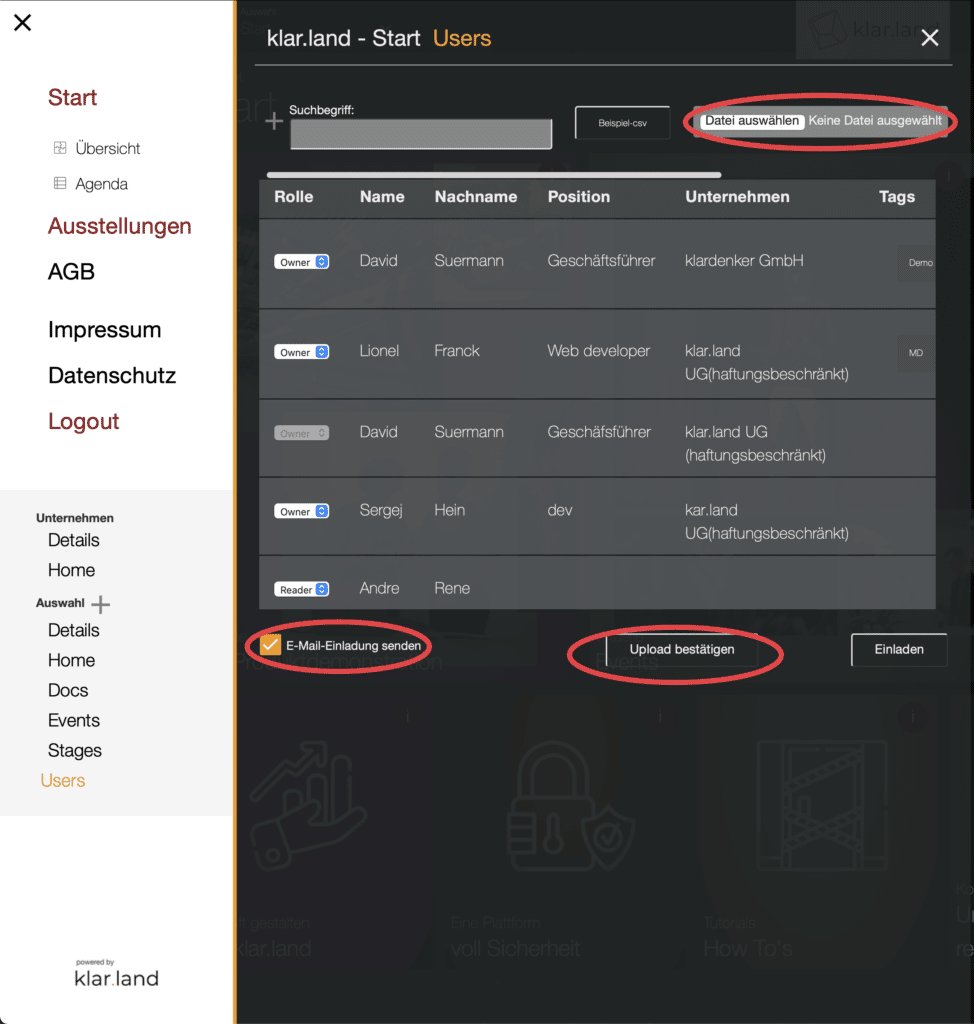
You can then decide whether you want to send your contacts an automatic invitation email from klar.land. If yes, check the corresponding checkbox at the bottom left.
Users will then receive an email with the subject “(company name) would like to invite you to (area)”. Your name will be mentioned in the text of the e-mail. The email also contains an “Access (area) here” button. When clicking on it, the user is automatically redirected to a form with which he can change or reset his password. After the confirmation click on “Reset password” he comes to the login screen and then to the desired area.
If you want to add your contacts but send a separate email to invite them from your CRM or email system, leave the checkbox empty.
Afterwards, start the process with “Confirm upload”.
Instructions for sending invitations from your CRM or mail system:
You don’t want to use the generic email from klar.land, but send an individual email to your contacts? Then you can add the following information to simplify the signup process for your contacts.
If your contact is not yet a user of klar.land, send them an invitation e-mail and give them the option in the e-mail to log in directly to the workspace of your company that is relevant to them in a straightforward manner.
To do this, copy the URL of the workspace you want to invite your contacts to.
The URL is built according to the following principle:
https://klar.land/IHRUNTERNEHMEN/IHRWORKSPACE (this may look like this: “https://klar.land/klarland/start/”)
Should your contact call this URL, he would have to log in or still register.
However, you can directly give him the option in the link of the email to just set a password and log in without having to perform unnecessary clicks and read information.
To do this, add a “#/login/pass_forgot” after the URL to your workspace (example: https://klar.land/klarland/start/#/login/pass_forgot). This will allow your contact to directly enter the email address you have already registered for them, and they can follow the automatic login process.
Add users in multiple workspaces:
Now a contact is already registered on klar.land or has also been invited by you to a workspace. However, some contacts should have access to multiple workspaces? Then we have a solution for that, too.
Follow the same path as described above. Our system automatically detects whether the user is new or already exists. This is done by matching the e-mail address.
Now klar.land automatically sends an email to a contact who is added to another workspace, informing them that they have now also been given access to this additional workspace.
So you can add your contacts in different workspaces individually or with the CSV list.
How to manage large numbers of users:
Already in the CSV list you have the possibility to add “tags” to users. This allows you to search for user groups, filter and address them again and again in different positions of klar.land. For example, there is an option to invite users who have a specific tag when creating a virtual event. For example, you can invite all “Employees IT” to a separate event without having to add each IT employee to the event individually.
You can also add and edit the tags in the User overview of the menu. To do this, scroll further to the right and click on the “Edit” icon next to the “Tag” area of the contacts.
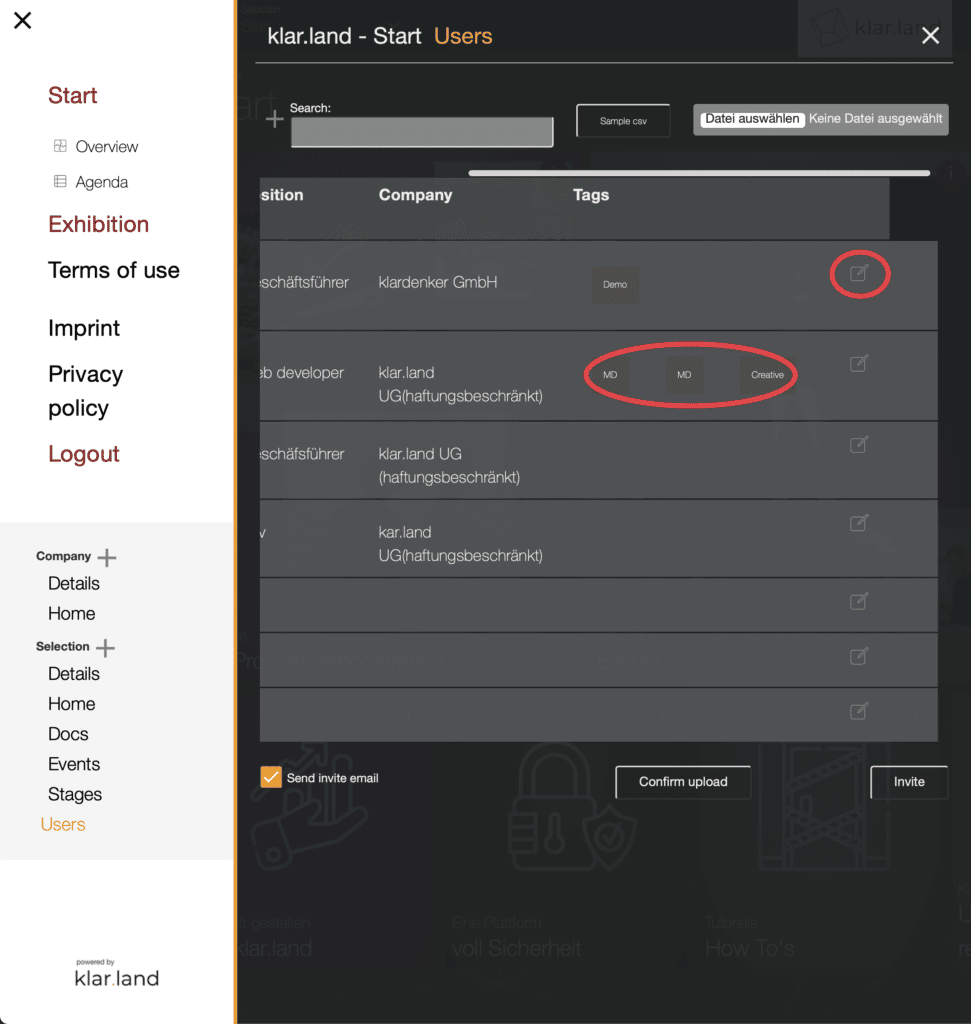
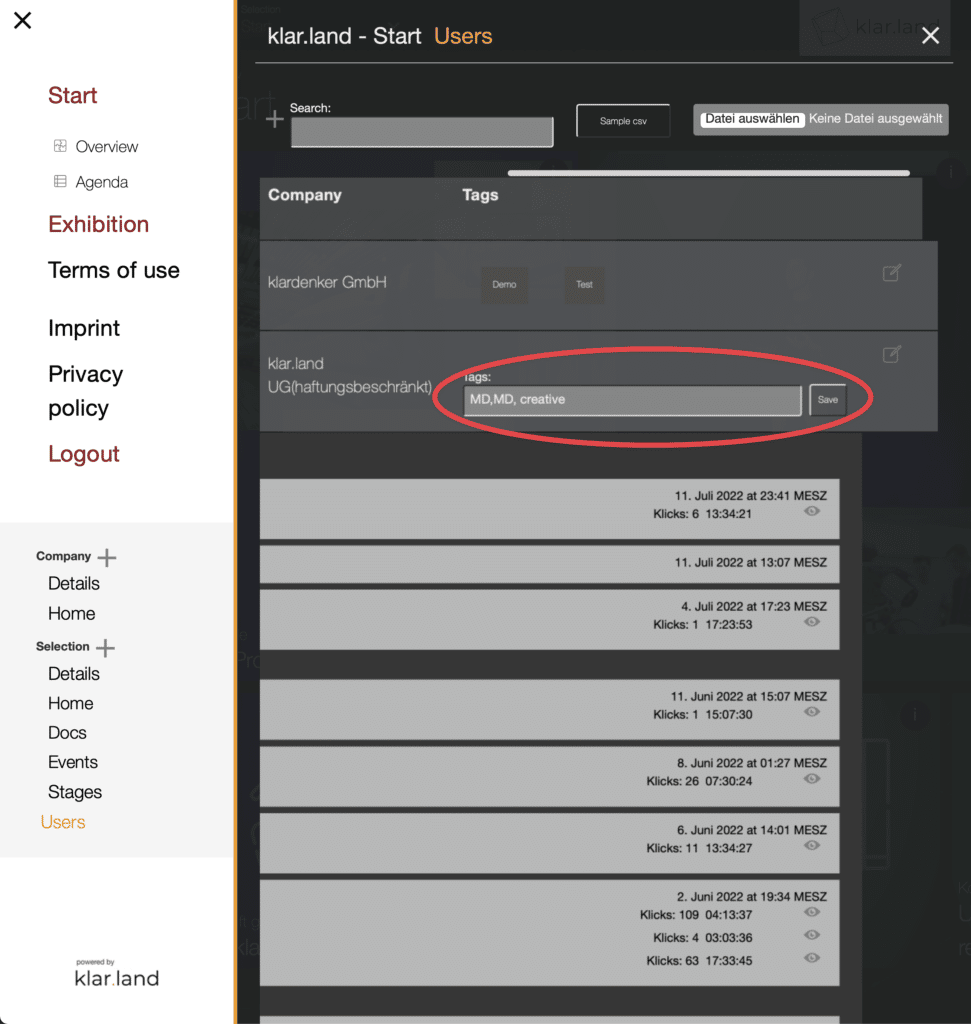
Enter multiple tags separated by a “,” in the field and then “save”.
Clicking the X at the end of the user line deletes the user.
